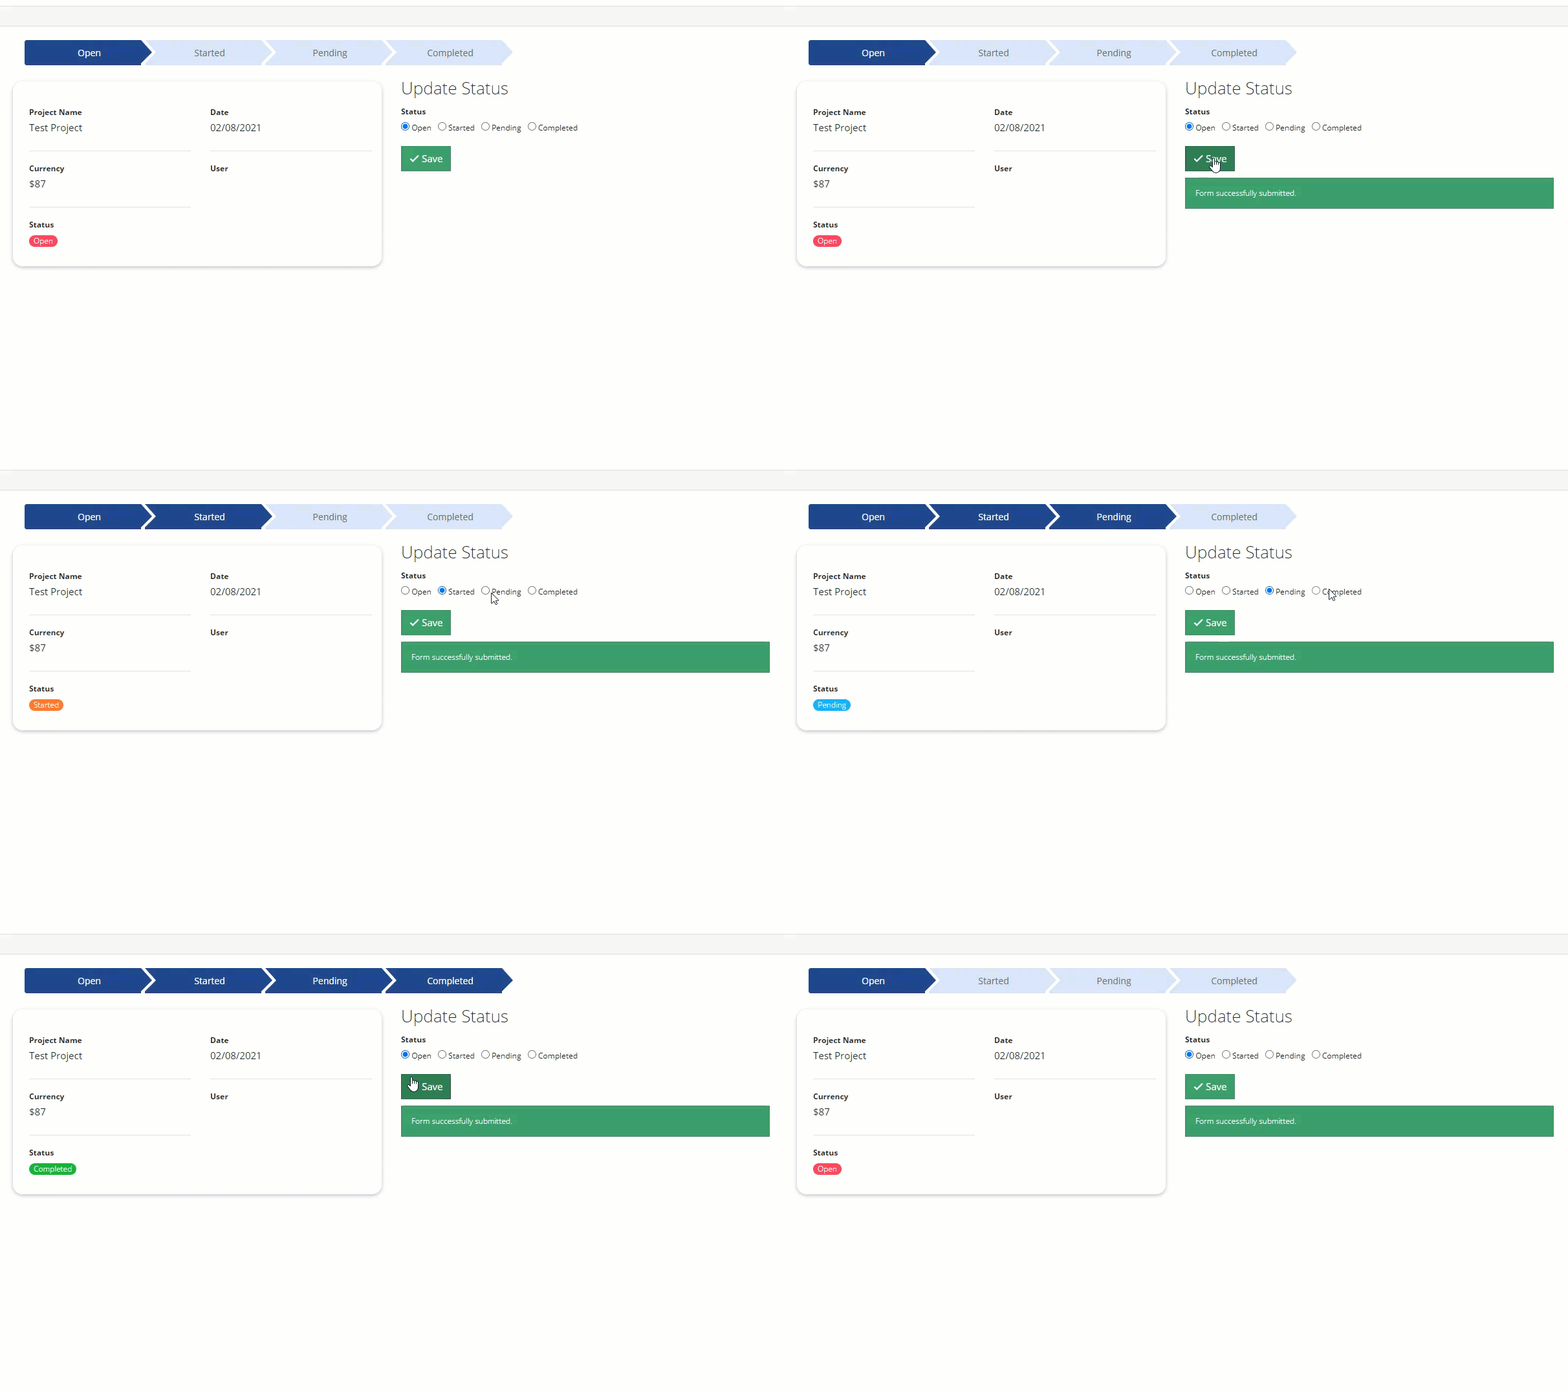
Show Progress Based on Field Value
Please note that this is now available as a plugin for easier installation. While you can use this document as a reference, the recommended method to add this functionality is through the plugin installation wizard. Learn more about plugins here.
 Moving through progress on a task is excellent visual customization you can make to your page.
1. Here, I have a radio field with four options. Take note of the field id (field_222 in my case):
2. Inside your details page, add an HTML Component.
3. In your HTML Component, paste the following code into the source code <>. Be sure to update this to match the field values you have in your app.
<div class="container">
    <div class="wrapper">
        <div class="arrow-steps clearfix component-3-progressbar">
            <div class="step" data-id="Open">Open</div>
            <div class="step" data-id="Started">Started</div>
            <div class="step" data-id="Pending">Pending</div>
            <div class="step" data-id="Completed">Completed</div>
        </div>
    </div>
</div>
4. In the JavaScript tab of your page, add the following code. Change field_222 and TB.render('component_3, to the component id of your details component.
The details component must contain the radio field.
TB.render('component_3', function(data) {
    jQuery('.component-3-progressbar > div').removeClass('current');
    jQuery('.component-3-progressbar > [data-id="' + data.record.field_222 + '"]').addClass('current').prevAll().addClass('current');
});
5. Finally, you will add the following code to your CSS tab, and you are done!
.arrow-steps .step {
    font-size: 14px;
    text-align: center;
    color: #666;
    cursor: default;
    margin: 0 3px;
    padding: 10px 10px 10px 30px;
    min-width: 180px;
    float: left;
    position: relative;
    background-color: #d9e3f7;
    -webkit-user-select: none;
    -moz-user-select: none;
    -ms-user-select: none;
    user-select: none;
    transition: background-color 0.2s ease;
}

.arrow-steps .step:after,
.arrow-steps .step:before {
    content: " ";
    position: absolute;
    top: 0;
    right: -17px;
    width: 0;
    height: 0;
    border-top: 19px solid transparent;
    border-bottom: 17px solid transparent;
    border-left: 17px solid #d9e3f7;
    z-index: 2;
    transition: border-color 0.2s ease;
}

.arrow-steps .step:before {
    right: auto;
    left: 0;
    border-left: 17px solid #fff;
    z-index: 0;
}

.arrow-steps .step:first-child:before {
    border: none;
}

.arrow-steps .step:first-child {
    border-top-left-radius: 4px;
    border-bottom-left-radius: 4px;
}

.arrow-steps .step span {
    position: relative;
}

.arrow-steps .step span:before {
    opacity: 0;
    content: "✔";
    position: absolute;
    top: -2px;
    left: -20px;
}

.arrow-steps .step.done span:before {
    opacity: 1;
    -webkit-transition: opacity 0.3s ease 0.5s;
    -moz-transition: opacity 0.3s ease 0.5s;
    -ms-transition: opacity 0.3s ease 0.5s;
    transition: opacity 0.3s ease 0.5s;
}

.arrow-steps .step.current {
    color: #fff;
    background-color: #23468c;
}

.arrow-steps .step.current:after {
    border-left: 17px solid #23468c;
}
Original Community Post:
https://community.tadabase.io/t/show-progress-based-on-field-value/933/4


We'd love to hear your feedback.