Logo
For example "scheduled tasks"
Search
Info
Content
Category Navigation
  • 🎯  Solution Guides

  • Low Code Solutions

    Add "Tabs" to your app

    ID Target Link

    Use an address field to display a static street view thumbnail

    Turn your menu into a fixed menu

    Auto close mobile menu

    Display record information in a card

    How to add a back button to your app

    Add a collapsible accordion element to your app

    Code Snippets

    PHP Curl Create New Record

    PHP Get Records With Filters

    Google Scripts - Get record and create new records from connected table

    Save Tables and Fields into Spreadsheet

    Google Scripts - Export all records

    Webhook to save deleted records

    Send Messages to Slack

    Restrict Space and Force Uppercase in a Form

    Building Advanced Features

    Use Validation Rules to Ensure Unique Votes Per User

    Use Record Rules to Create an Audit Log

    Track current inventory with transactions

    Schedule Bookings and Prevent Double Bookings

    Create orders with multiple items and varying quantities

    2 Step Forms

    Unique Record Validation

    Restrict Editing Records to Record Owners

    Sum date/time field

    Duplicate Records

    Advanced App Customization

    How to embed a Tadabase page on another website

    Adding external fonts

    Custom Favicon

    Making apps mobile friendly

    Show date/time as a countdown

    Importing many images at once

    Adding QR Codes

    Adding charts to PDFs

    Customizing your app shortcut for mobile phones

    Animate parts of a page

    Design Customization

    Changing background colors

    Set background colors to the edge of a page

    Change the background of a column

    Add padding around a component

    Using an image as background for a page

    Adding a background image to a row, column, or component

  • Duplicate Connected Records

Categories
🎯 Solution Guides
Building Advanced Feat...
2 Step Forms

2 Step Forms

Learn how to use routing to have a 2 step form process 


If you're looking to have a 2 step form process, this screenshot tutorial will help you do that. 

The objective is to be able to accept some form inputs on step 1, route the user to step 2, and complete adding the record details. 

The process revolves around using the Submit Rules in a form and routing the user to a details page for this data table. 

For our example, we're going to be using a Customers table with the following fields:


14Z1ZGFZfmBLQZj-WnY1xQkGbh3z8iNLfA.png


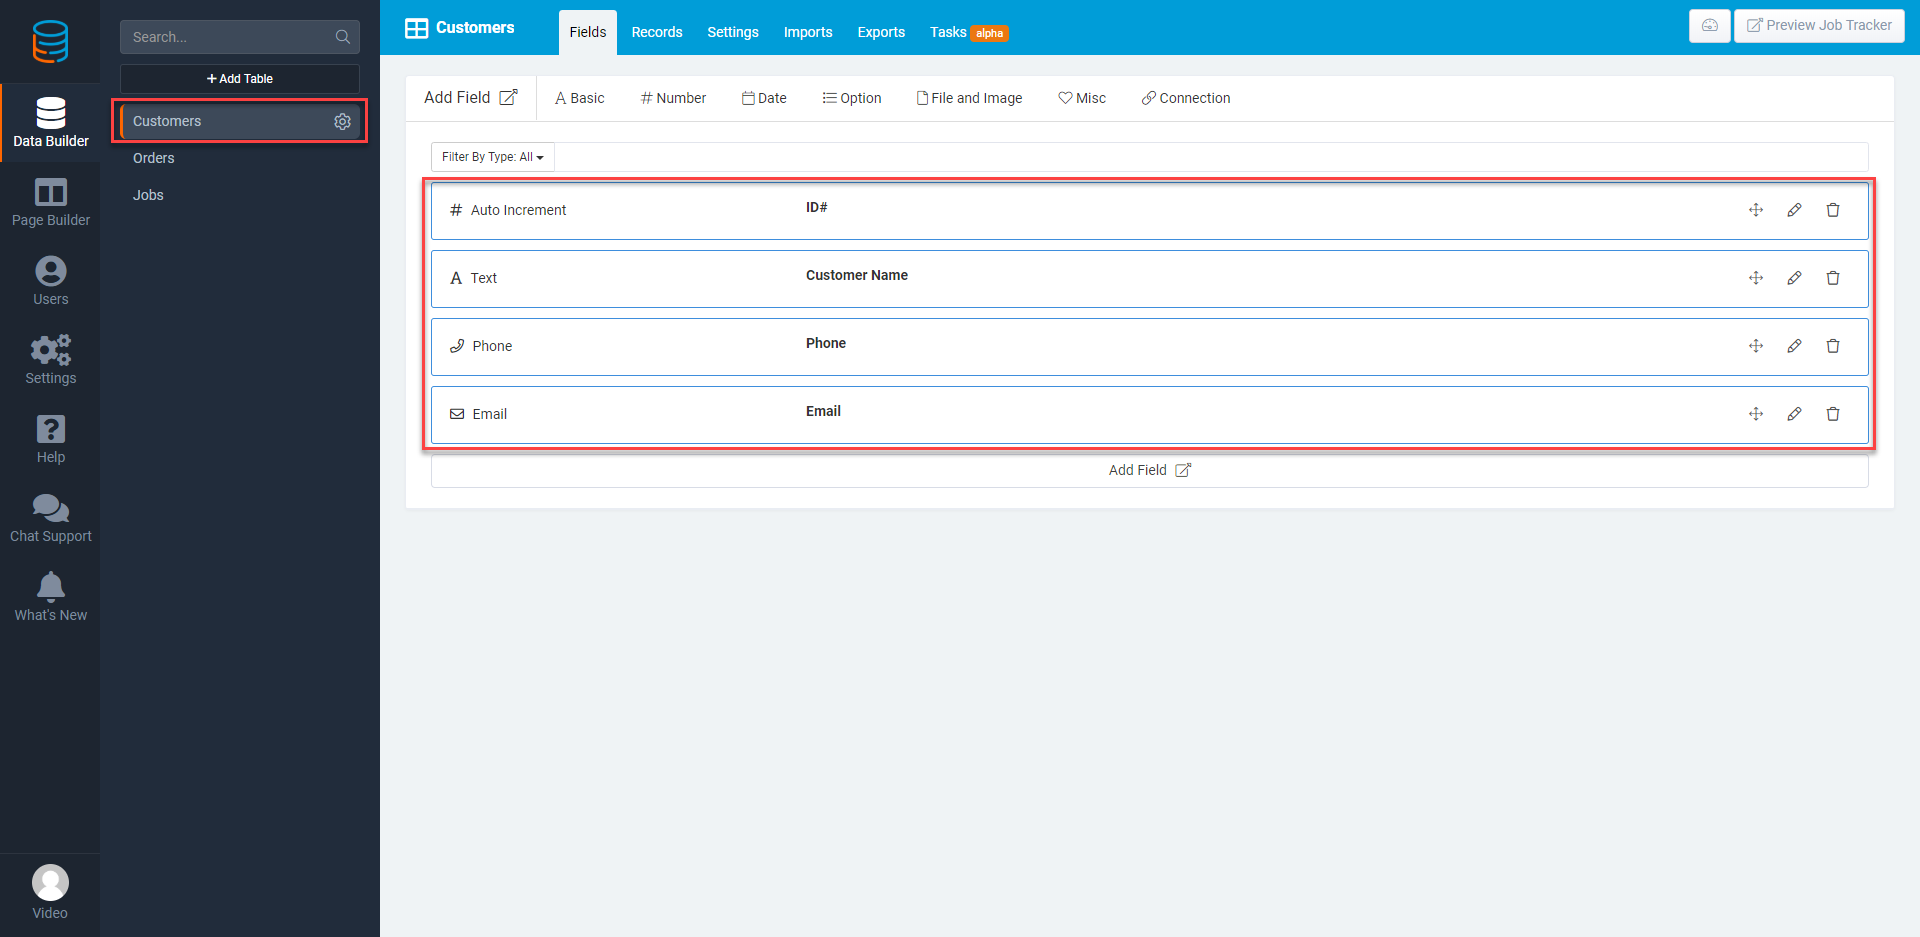
Next, let's add a new page with a table, form, and record details for each record. This will allow us to see all the customers, add new customers, and see their details (which will be used for updating customers as well). 

s7l9U4FdhujF6wXX7bL3c0fyJdO5vQWbnA.png


Once you've added the page, add a Table component 

kCZ_p5KER0I2qEmgnCDwGyA12vkMIK7oEQ.png


and choose the customers table, and then + Quick Add 

u7XGRg6NMV2SJOppdbHDzHWB8p9ZUueXBA.png


In the following screen, be sure to choose Yes for "Include inline form to add Customers?" and "Include link to Customers Details page" 


SxoPQl4SiChJEVyJ1kOU1EWxTwfAth4YMw.png


Two new pages will be automatically created- the Add New Customer page as well as the Customer Details page. Open the Add Customers Page:  

lvemGFcMGv53sbKE0k_WMOCD0F_1S5wiaw.png


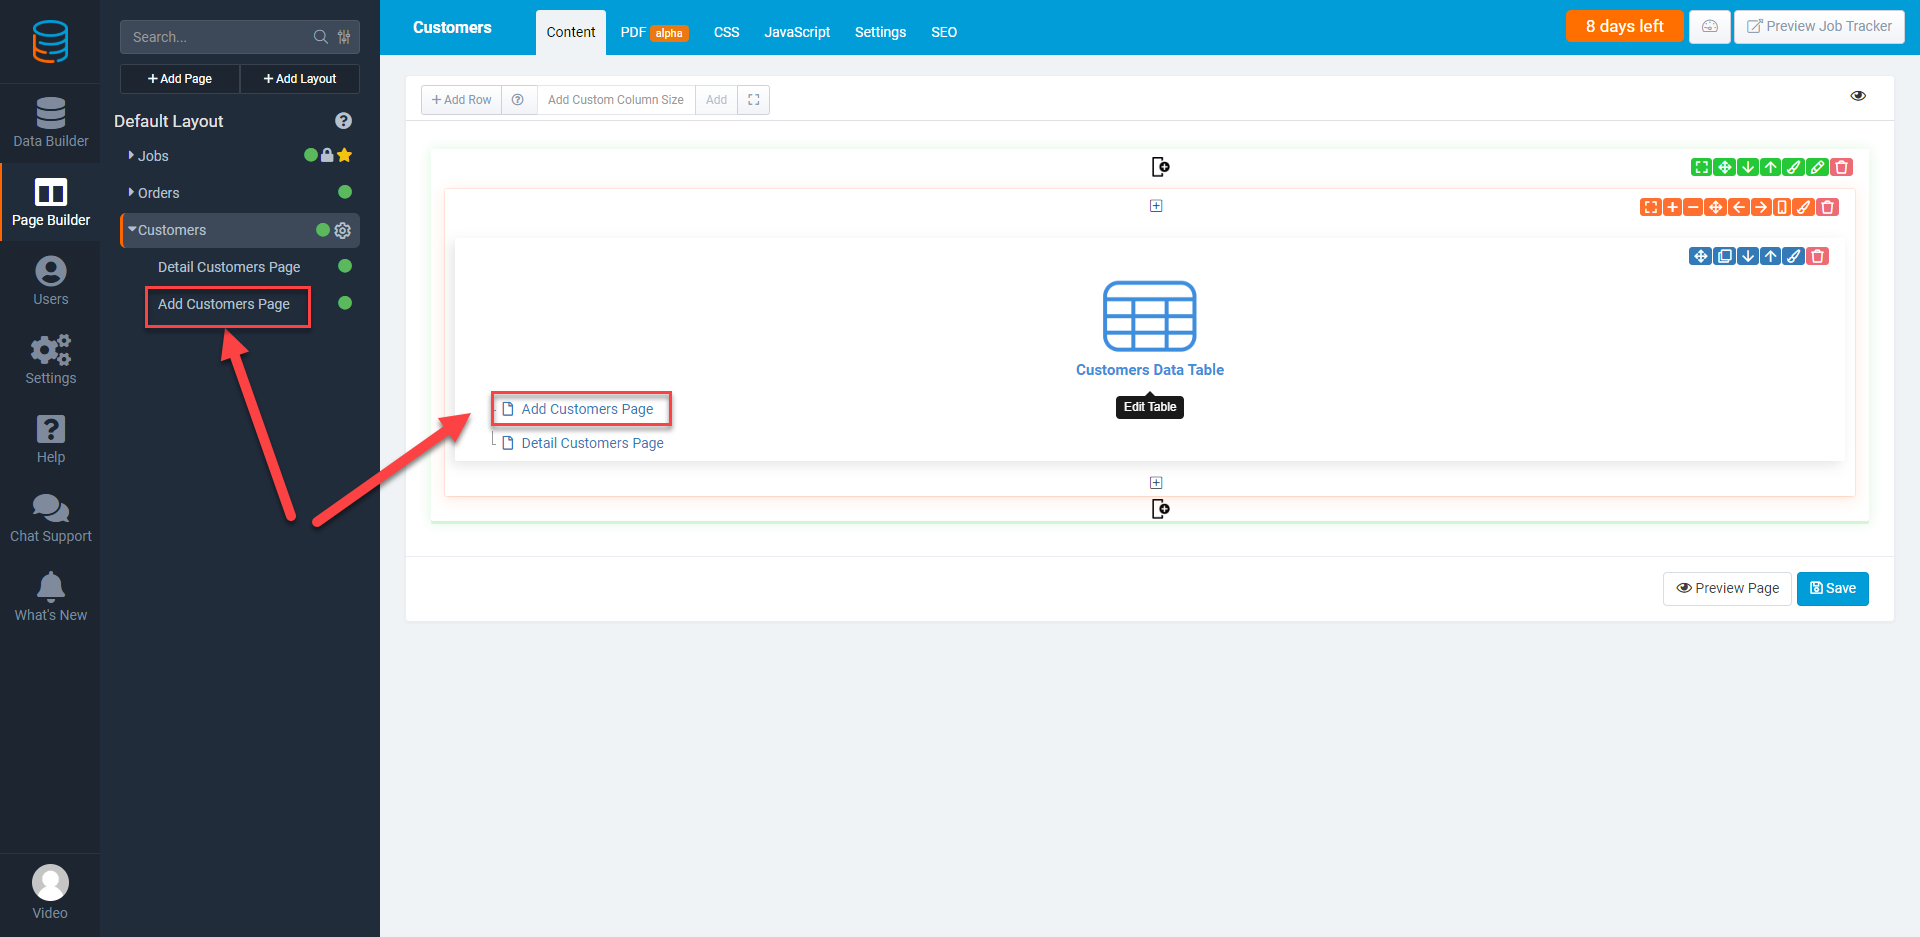
Lets click on the form to edit it. 


mI8OQ8vsvbk3SzKY7JkVboIKFbb_jImdEg.png


Since in the first step of this form process we only want to ask for the customer's name, we'll remove all the fields except for the customers name.  


OoAM1ncDKz0gMrNx9lb2jpwx8RJUzaApjQ.png


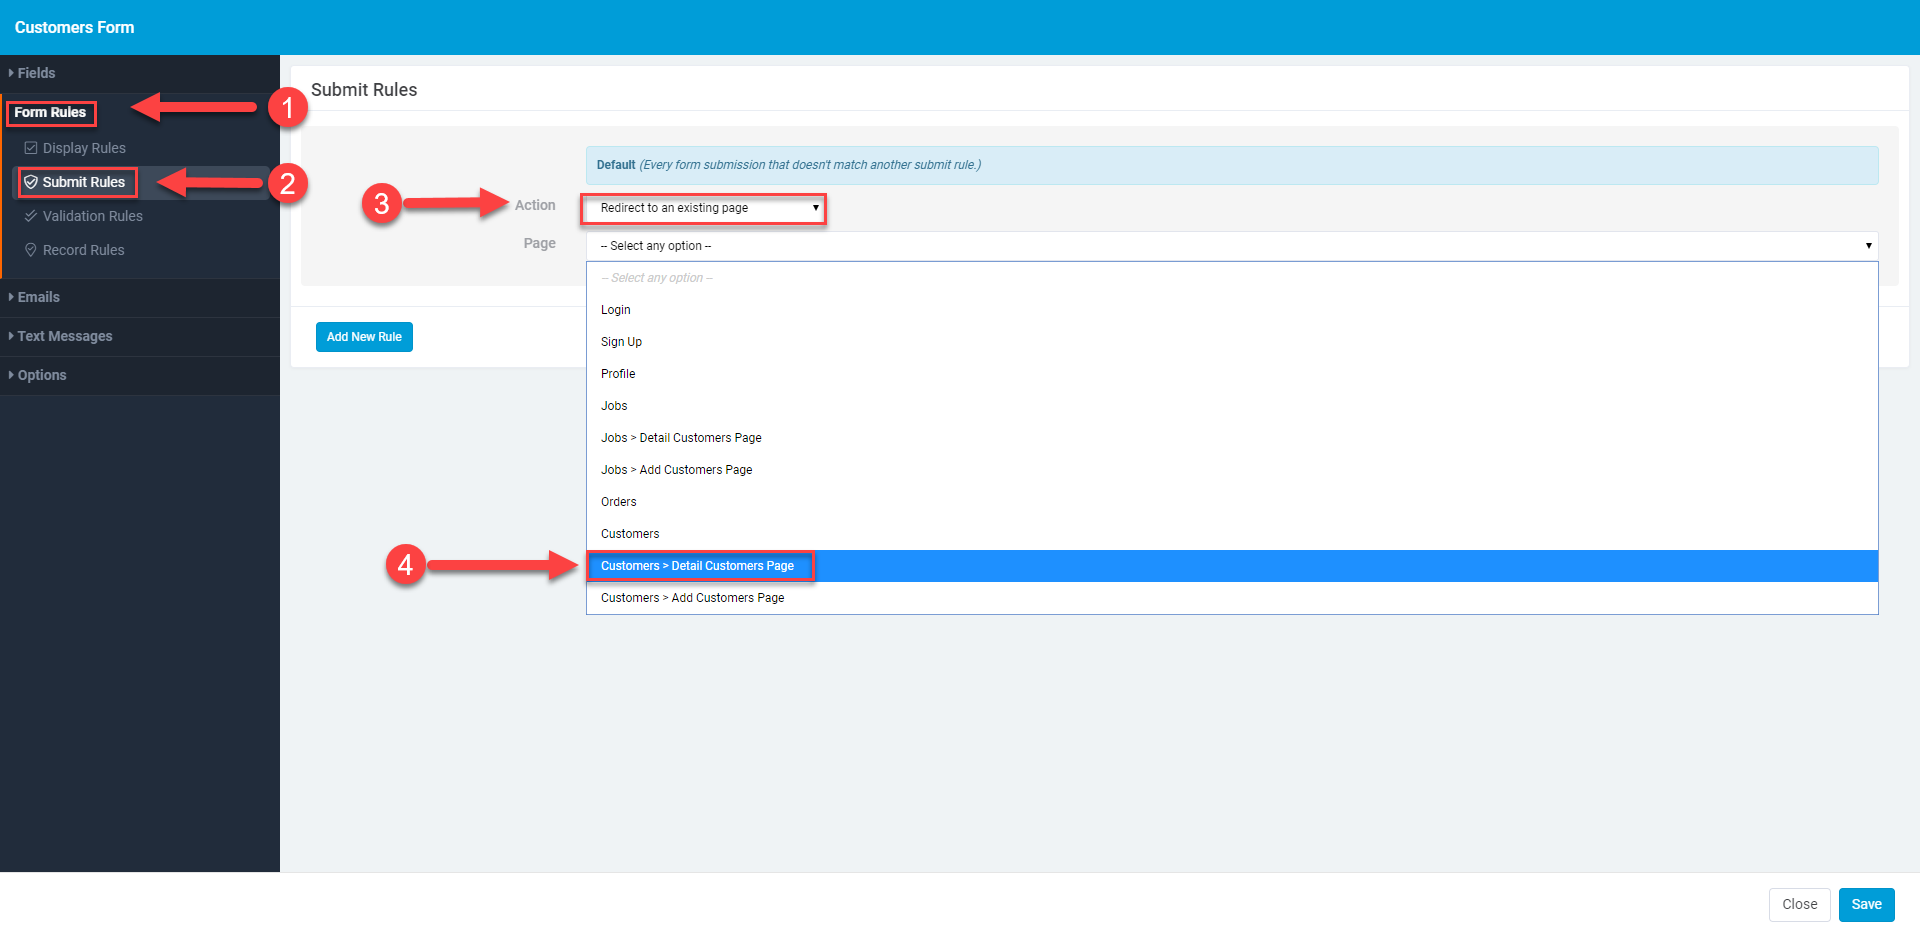
Next we need to route our users to the Customer Details Page where they'll complete this signup process. To do that: 

  1. Click on Form Rules
  2. Select Submit Rules
  3. Under Action, choose Redirect to an existing page
  4. In Page, select Customers > Detail Customers Page

GYlo-xcxQJZxOjP3QuJtvZ3Z4aebRcwhvw.png


Great! Now when users click to save the record they'll be routed to the details page of this new record being created. In the details page, we must now add a form to update this record so they can complete adding the record. 

Open the Details Customers Page and either remove the details component (if you wish) 

aqADWRt_v7GjynuZCy5filpAxTTiqm8qNA.png


or simply add a new Form component 


Zy0x_8tGgc3E1TLKs7M6v9dK8hgCBhe98Q.png


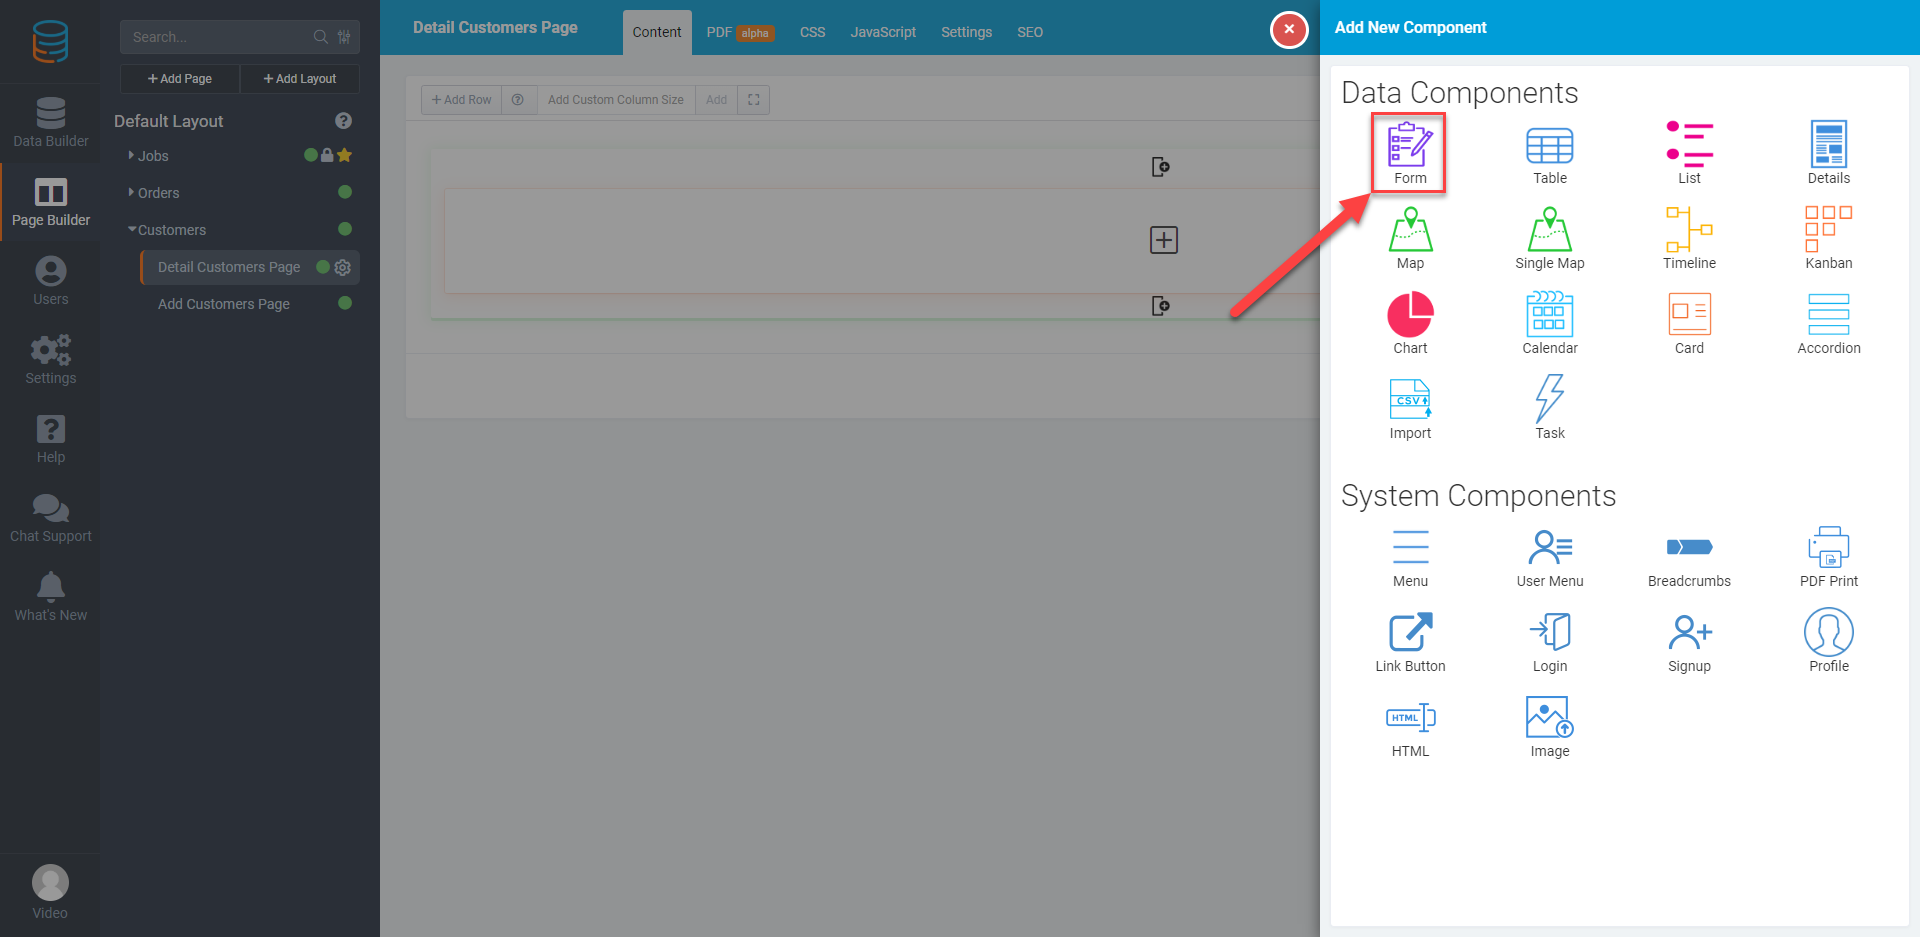
Then be sure to select Update this page's customers 

VegyQzHx8NiEcXETbEcHDZXzeCpPL2-Qgg.png


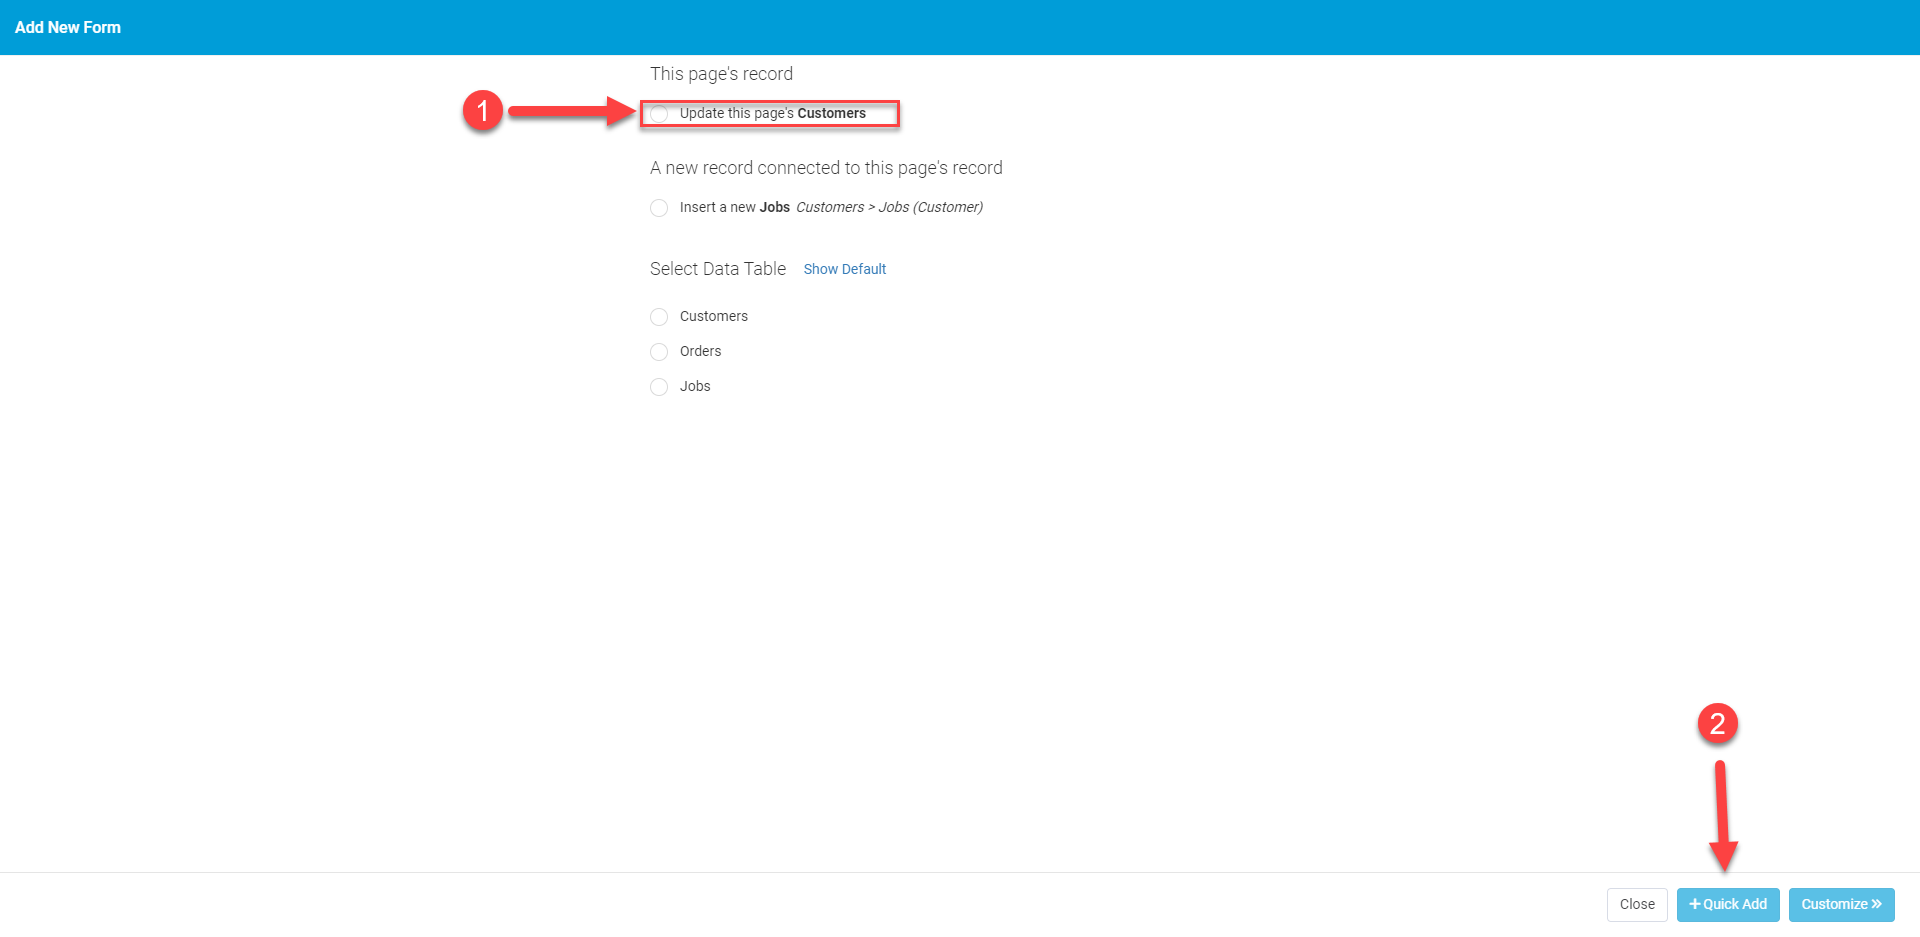
Finally, press Quick Add. 

When users create a new record they will be routed to a second page to complete this process, as can be seen here: 

xnShds8OH3tvqGljNpcuOyGwq7Rc5xJ3Bg.gif


Please note this can be done with any details page. You can add an Edit form onto any details page and then route users directly to that page.  

How did we do ?

Previous Article
Create orders with multiple items and varying quantities
Next Article
Unique Record Validation
Back to top
API
100% Operational
Apps
100% Operational
Builder
100% Operational
Overall Status
100% Operational