Importing many images at once
In this article we will demonstrate how to import many images at one time.
At this time, Tadabase does not yet support importing image field types. While users can import links to images, they can also utilize the following method to import many images to their apps.
We'll use the following CSV to demonstrate how to import many images at once.

In the Data Builder, add a Text Field titled "Image URL":

Then, import the list of images as shown below.
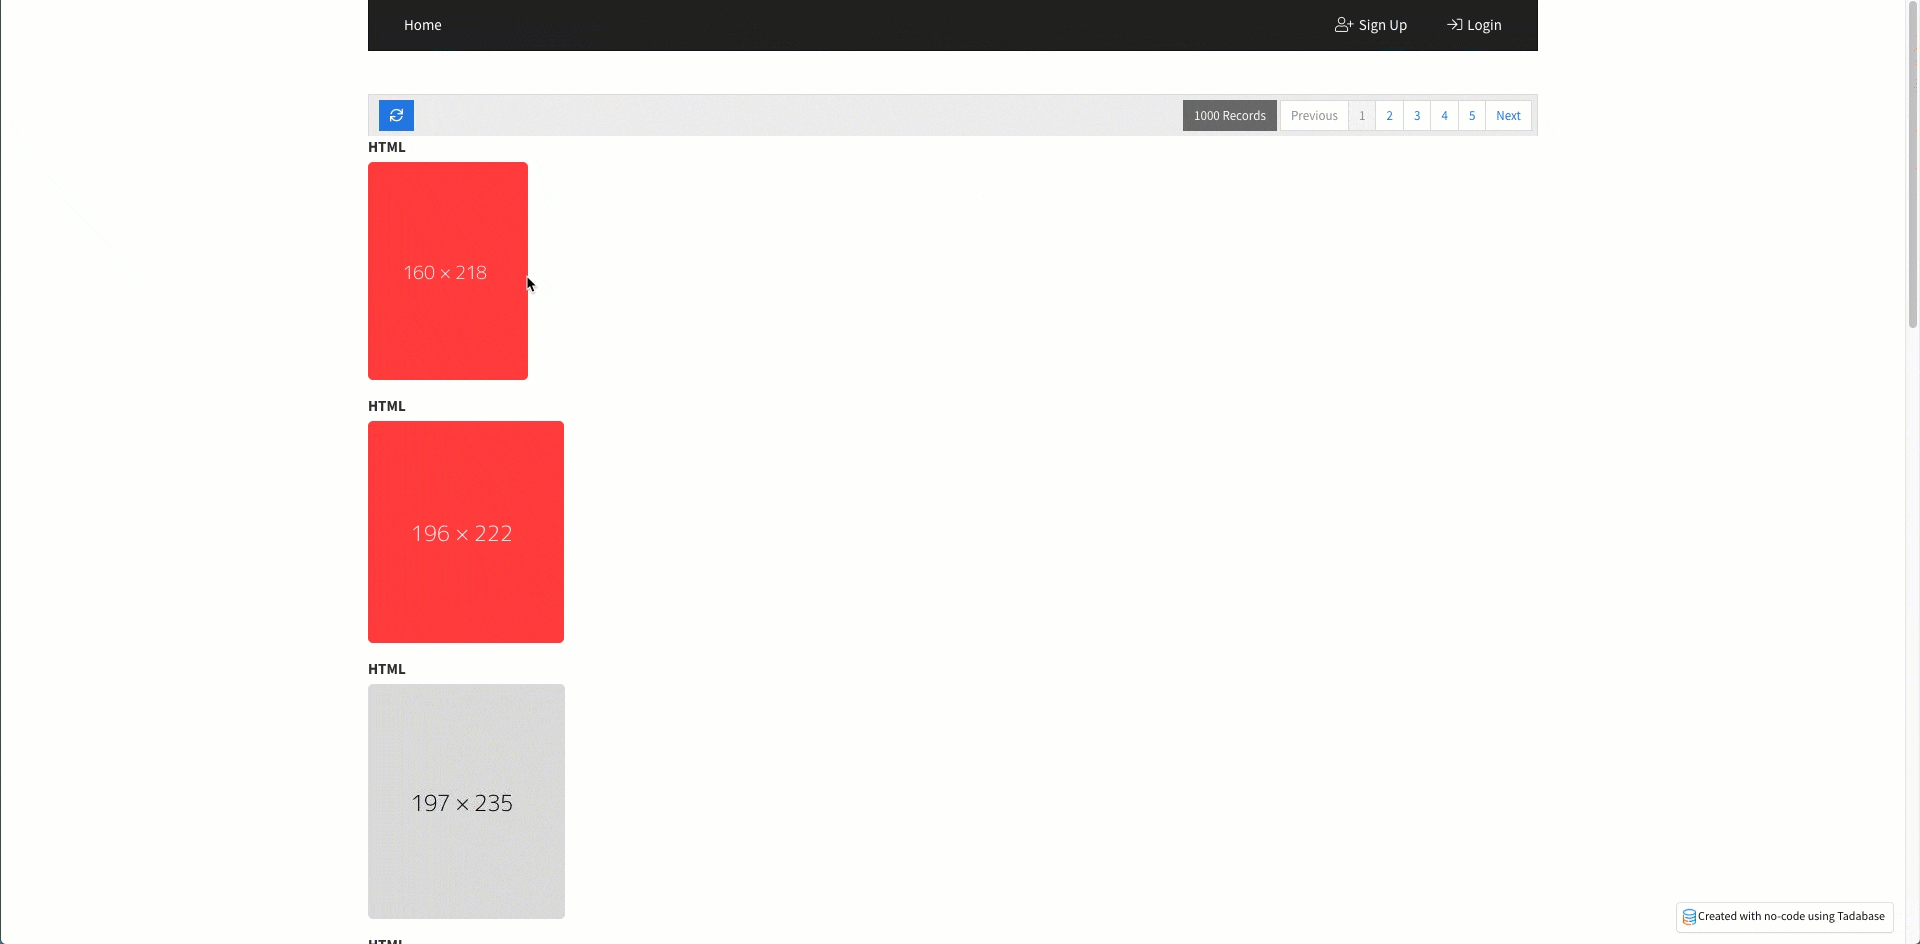
Once you have imported the list of images, you can display them on the live app by adding a list component:

You can name the list component "Images List". Within the list component, click Add HTML Component, and then click the pencil icon of the HTML component to edit it. Within the edit HTML component window, click Add Field, and select the Image URL field. This adds the Image URL variable within the HTML component as {Image URL}:

Copy the {Image URL} text. Click the Insert/Edit Image and paste the {Image URL} variable into the Source input. Click Ok and then Update and Save.

As you can see on the live app, you have just created a list component of all the imported images.

If you'd like, you can also make each picture enlarged within a new popup window when clicked.
To do this, start by adding the following to your html list item:
class="list-image"
The source code should appear as such:
<p><img class="list-image" src="{Image URL}" alt="" /></p>

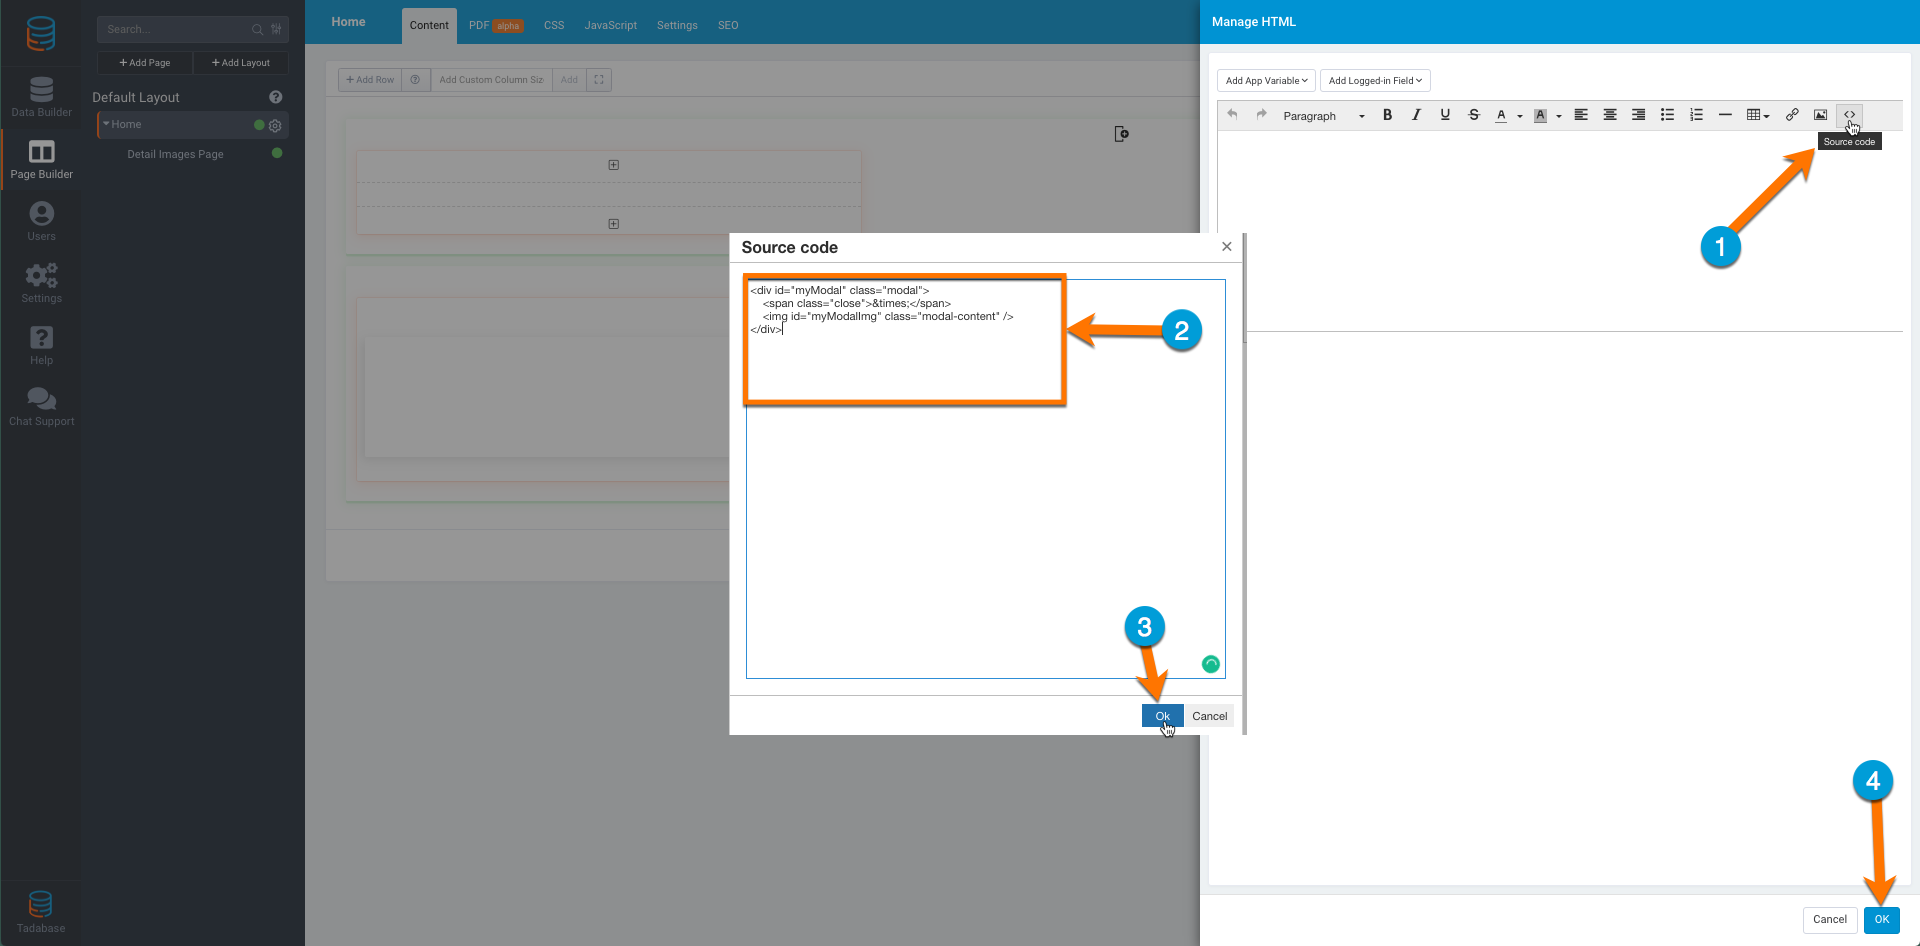
Next, add an HTML component to the same page that holds the list component. 
Within the HTML component, edit the source and paste the following HTML code:
<div id="myModal" class="modal">
<span class="close">×</span>
<img id="myModalImg" class="modal-content" />
</div>
Now, on the same page, let's head over to the CSS section and add the following:
/* Style the Image Used to Trigger the Modal */
.list-image {
  border-radius: 5px;
  cursor: pointer;
  transition: 0.3s;
}

.list-image:hover {opacity: 0.7;}

/* The Modal (background) */
.modal {
  display: none; /* Hidden by default */
  position: fixed; /* Stay in place */
  z-index: 1000; /* Sit on top */
  padding-top: 100px; /* Location of the box */
  left: 0;
  top: 0;
  width: 100%; /* Full width */
  height: 100%; /* Full height */
  overflow: auto; /* Enable scroll if needed */
  background-color: rgb(0,0,0); /* Fallback color */
  background-color: rgba(0,0,0,0.9); /* Black w/ opacity */
}

/* Modal Content (Image) */
.modal-content {
  margin: auto;
  display: block;
  width: 80%;
  max-width: 700px;
}

/* Caption of Modal Image (Image Text) - Same Width as the Image */
#caption {
  margin: auto;
  display: block;
  width: 80%;
  max-width: 700px;
  text-align: center;
  color: #ccc;
  padding: 10px 0;
  height: 150px;
}

/* Add Animation - Zoom in the Modal */
.modal-content, #caption {
  animation-name: zoom;
  animation-duration: 0.6s;
}

@keyframes zoom {
  from {transform:scale(0)}
  to {transform:scale(1)}
}

/* The Close Button */
.close {
  position: absolute;
  top: 15px;
  right: 35px;
  color: #f1f1f1 !important;
  font-size: 40px;
  font-weight: bold;
  transition: 0.3s;
}

.close:hover,
.close:focus {
  color: #bbb;
  text-decoration: none;
  cursor: pointer;
}

/* 100% Image Width on Smaller Screens */
@media only screen and (max-width: 700px){
  .modal-content {
    width: 100%;
  }
}

Lastly, add the following code to the JavaScript section:
$(function () {
  $('body').on('mousedown', function () {
    var modal = $("#myModal");
    $('.list-image').on('click', function () {
      var modalImg = $('#myModalImg');
      modal.css('display', 'block');
      modalImg.attr('src', $(this).attr('src'));
    });
    $('.close').on('click', function () {
      modal.css('display', 'none');
    });
  });
});
Once you save this Javascript, all imported images will be clickable into an enlarged popup as demonstrated below.
We'd love to hear your feedback.