Filtering Data
Data Source Selection & Filtering
Filtering records is most commonly done inside of the data source of a data component. This means that the component is only going to show record based on the filter criteria that has been configured. Adding a filter to a data source will filter the data server-side, meaning that the data is filtered before leaves Tadabase servers and is displayed in your application.
Once you select a Data Component to add within the column of a page, you will be prompted to select the data table from which you want this Data Component to display records.
Depending on the configurations of the data tables within your app and whether the page you are adding the Data Component to is a parent page or a child page, there may be several options to choose from when a selecting a data table for each Data Component .
Below is a chart outlining each option for displaying records via a data component as well as when each option is available.
| Option For Displaying Records | Parent Page | Child Page | Notes |
| Select the Data Table | Yes | Yes | Always available |
| Records connected to logged in user | Yes | Yes | Only when there is a connection to the users table |
| Records connected from the logged in user | Yes | Yes | Only when there is a connection from the users table to another table. |
| Records connected to this page | No | Yes | When there is a connection to or from this details page |
| Records related to this page | No | Yes | When there is a related record to this record |
Connected to the logged-in user
The Records Connected to the Logged In User option will be available only if there are any data tables within your app that contain a connection field to the default Users data table. Any data tables containing a connection to the Users data table will be available under this option.
For instance, if you have a Jobs data table and each job is assigned to a user, you will see the Records Connected to the Logged In User option available with the Jobs data table available as a selection.

Selecting a data table under the Records Connected to the Logged In User option will automatically create a Data Source filter within the Data Component that only displays records when the connection field to the Users data table is the currently logged-in user. Within the Data Source tab of the Data Component, you can see the filter that was automatically created when a data table under the Records Connected to the Logged In User option was added.

Multiple connections to the Users data table
If a data table has more than one connection to the Users data table, each connection will be displayed as its own option under the Records Connected to the Logged In User section.
For instance, if you have a Jobs data table and each job is assigned to a user and each job is also created by a user, both of these connections will be available as two separate options under the Records Connected to the Logged In User option.

Depending on the option you choose, a filter will automatically be added within the Data Component's Data Source tab to only show records when the connection field to the Users data table is the currently logged-in user.
Please Note: Data tables can be manually filtered at any time for each Data Component. To manually filter an existing data table to only show records that belong to the logged in user, simply add the condition in the component's Data Source tab.
Connected from the logged in user
The Records Connected from the Logged In User option will be available only if there are data tables within your app that are connected from the default Users data table.
As you can see in the sample connection graph below, the Records Connected from the Logged In User option includes connections that are made from the Users data table to the destination data table.

This is in stark contrast to the Records Connected to the Logged In User option which has the connection originating from the destination table to the Users data table.
It is important to differentiate between these two connection types when selecting a data table to display records via the new Data Component.
Details Component for Logged In User
The option above option are also available for the details component. Suppose each user is assigned to a company. Your objective is to show details of the company this user is assigned to. You can do so by adding a details component and choosing to show the single company. This method only works when:
- Connection originates in the Users table
- The connection is One User to One Company
Unlike the traditional details component which can only be added on details pages, when the above criteria is met the details component can be added anywhere.
In the screenshot below you can see a logged in user and the company details that this user is connected to.

Connected Records
When adding a new Component on a details page (aka child page) where the table that the given page’s record belongs to contains a direct connection, those table options will be visible here. For example, let's say we have an app with Companies and Jobs. Each Company has many jobs and each job belongs to a single company.
In this case, when viewing the company, we want to see all the jobs that belong to this company. When adding a data component on the details page those options are available:

You can see after the company name the description of how this connection is made. This is useful especially when you have more than one connection to the same table. In the above scenario, you can see that each job is connected to the company table using the Company field.
Please note, any selection made under the below two options create built-in filters for the table that cannot be altered at a later time.
Related Records
If there are any tables containing a second-degree connection to the given record’s table, you will see that option appear here. This means that there are three total tables involved: the chosen record’s table connected to another table that has a connection to the table(s) that appear as options under this section.
Another way to understand this is, options that appear here are connected to an option that is available in the records connected to this record section.
For example, if we have the following table structure:
- Companies - Each Company has many jobs
- Jobs - Each Job belongs to a company and has many Notes
- Notes - Each note belongs to a Job
When viewing the details of the company, we can see the connected Jobs (since each job belongs to the company) but with Related, we can also see all the Notes that belong to the jobs which further belong to this company.
For example, if a company has 5 jobs and each job has 3 notes we would see a total of: 15 (5X3) notes all of which are related to this specific company.

You can see the relationship details when selecting the data table. For example: this will show all the Notes connected to the Jobs using the "Job ID" field.
Manually Filtering by the Logged in User
Shared connection with the Logged In User
Throughout the platform, there are numerous places where you'll have the option to manually filter by the "is connected to Logged In User". When this option is present, it means that the only data that will be displayed is data that shares a connection with the Logged In User. This filter option is dynamic and will be applied to each User separately and simultaneously, based on each User that is currently logged in.
In the following example:
Event Expenses connect to Vendors
Users connect to Vendors

When displaying records from the Event Expense data table, we can filter the data to only show Event Expenses where the Logged In User and the Event Expense record are connected to the same Vendor record.
Is the Logged In User
Alternatively, when there is an outgoing connection from a data table to the Users table, you'll have the option to manually filter where the value of a record is the Logged In User.
In the following example:
Tasks are directly connected to Users through a Connection Field called "Assigned To"

When creating a filter, you'll be able to select "is the Logged In User" as a filter value.

Filtering by Connected Values
App Side Filter Menu
Within the Options tab of a table component, you can enable the Enable Filter setting which will add an Add Filters button to the table component that, when clicked, will enable users to add their very own front-end filters.
For instance, if you have an Applicant Tracking app, you can enable filters within the Jobs table component to allow users to click on the Add Filters button and create their own filters, such as a filter to only show records with a job type of "Full-time".
As demonstrated in the above gif, users can click on the x-icon to the right of their new filter to remove that filter and once again show all records.
Users can create multiple front-end filters by clicking on the Add Filter Group button to add additional filters.
When you set the Enable Filter setting to Yes, you will also be able to select the fields that you allow to be used as filter-by fields. By default, this setting is set to "All Fields", meaning all fields within a table component can be used as filter-by fields when users create their own filters. You can, however, select specific fields from the fields drop-down list to allow for only the specific fields you select to be used as filter-by fields.
Filter Tabs
Creating Filter Tabs
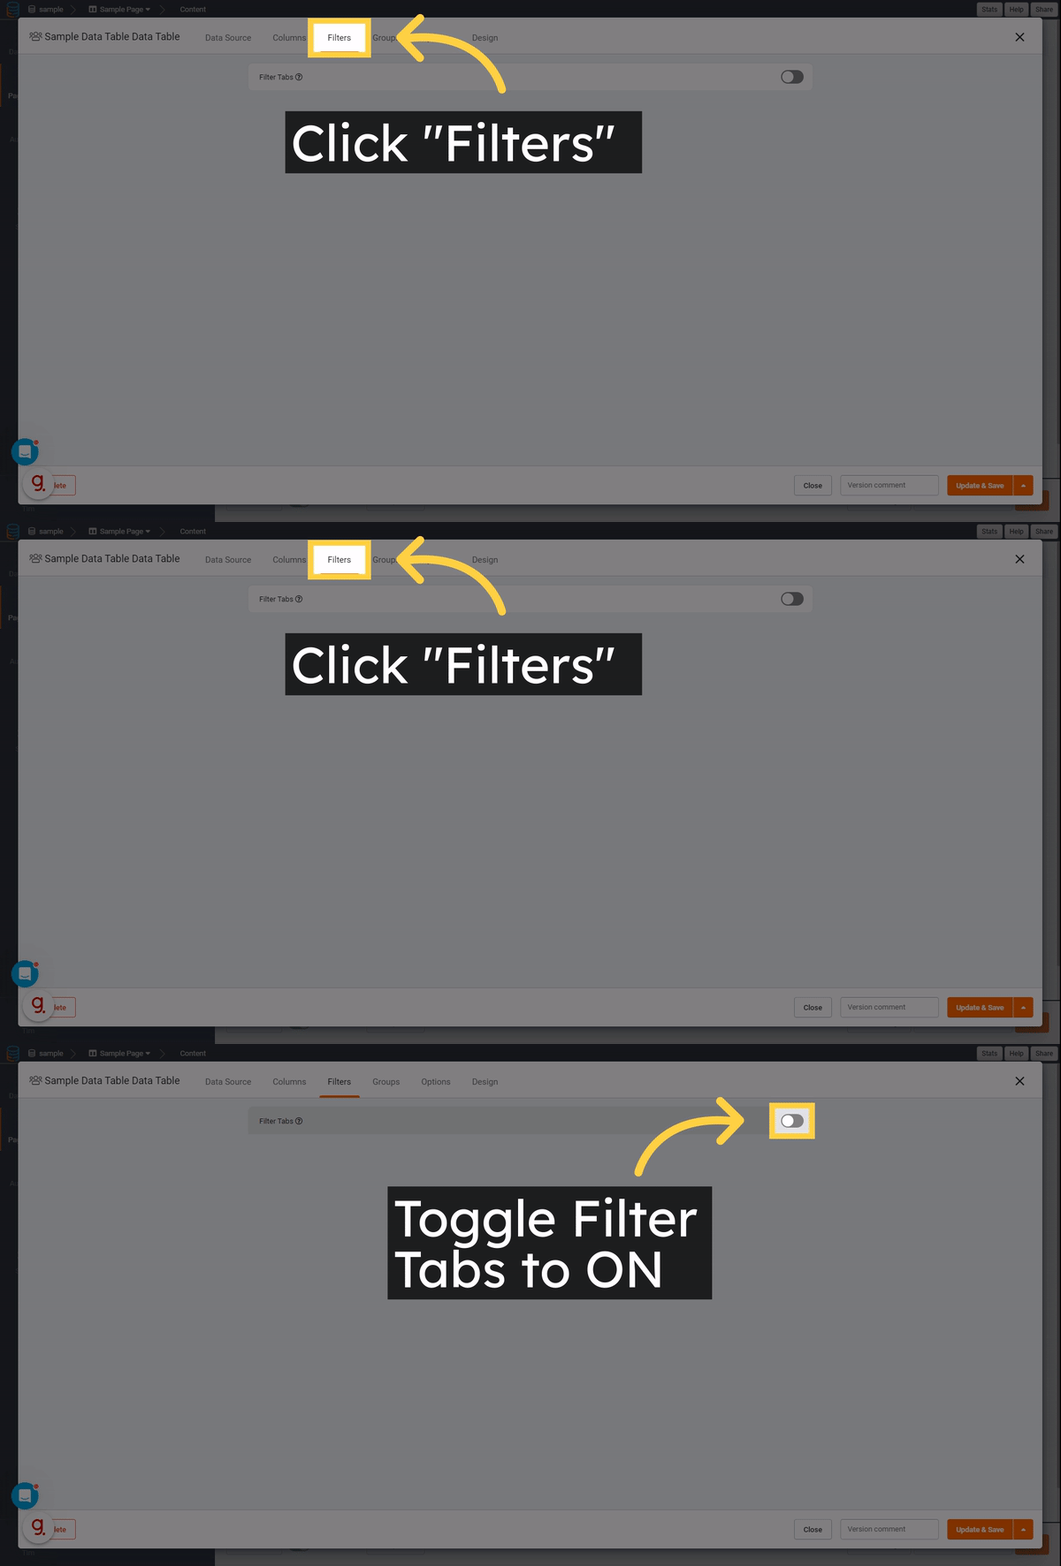
To create front-end filters for a table component, toggle the Filters setting from Disable (default) to Enable and create your first filter tab.
Filter Tabs must have a title!
 |
You can select a color tag for each filter tab to color-code the filter tabs within the table component. You can add additional filter tabs by clicking on the Add New Tab button beneath each existing tab. When the page first loads, none of the filter tabs will be chosen by default. To set a specific filter tab to be applied by default when the page loads, click on the Set Default button for that specific filter tab.
 |
For instance, within a Listings table component you can create filter tabs for each Listing Type as demonstrated below. Each filter tab has a tab title name of By Agent, By Owner, Foreclosure, etc. and a condition to show only records of each listing type within each filter tab. Each filter tab is also assigned a color tag to color-code the filter tabs.
If you wish to hide specific columns from being displayed when a particular filter tab is selected, enter or select those columns within the Hide Columns setting. This can be useful for certain filter tabs where some columns do not need to be visible.
On the live app, the Listings table component will now display these front-end filter tabs for users to filter records by Listing Type when a filter tab is selected.
Filter Tab Settings
Hide Clear Filter Tab
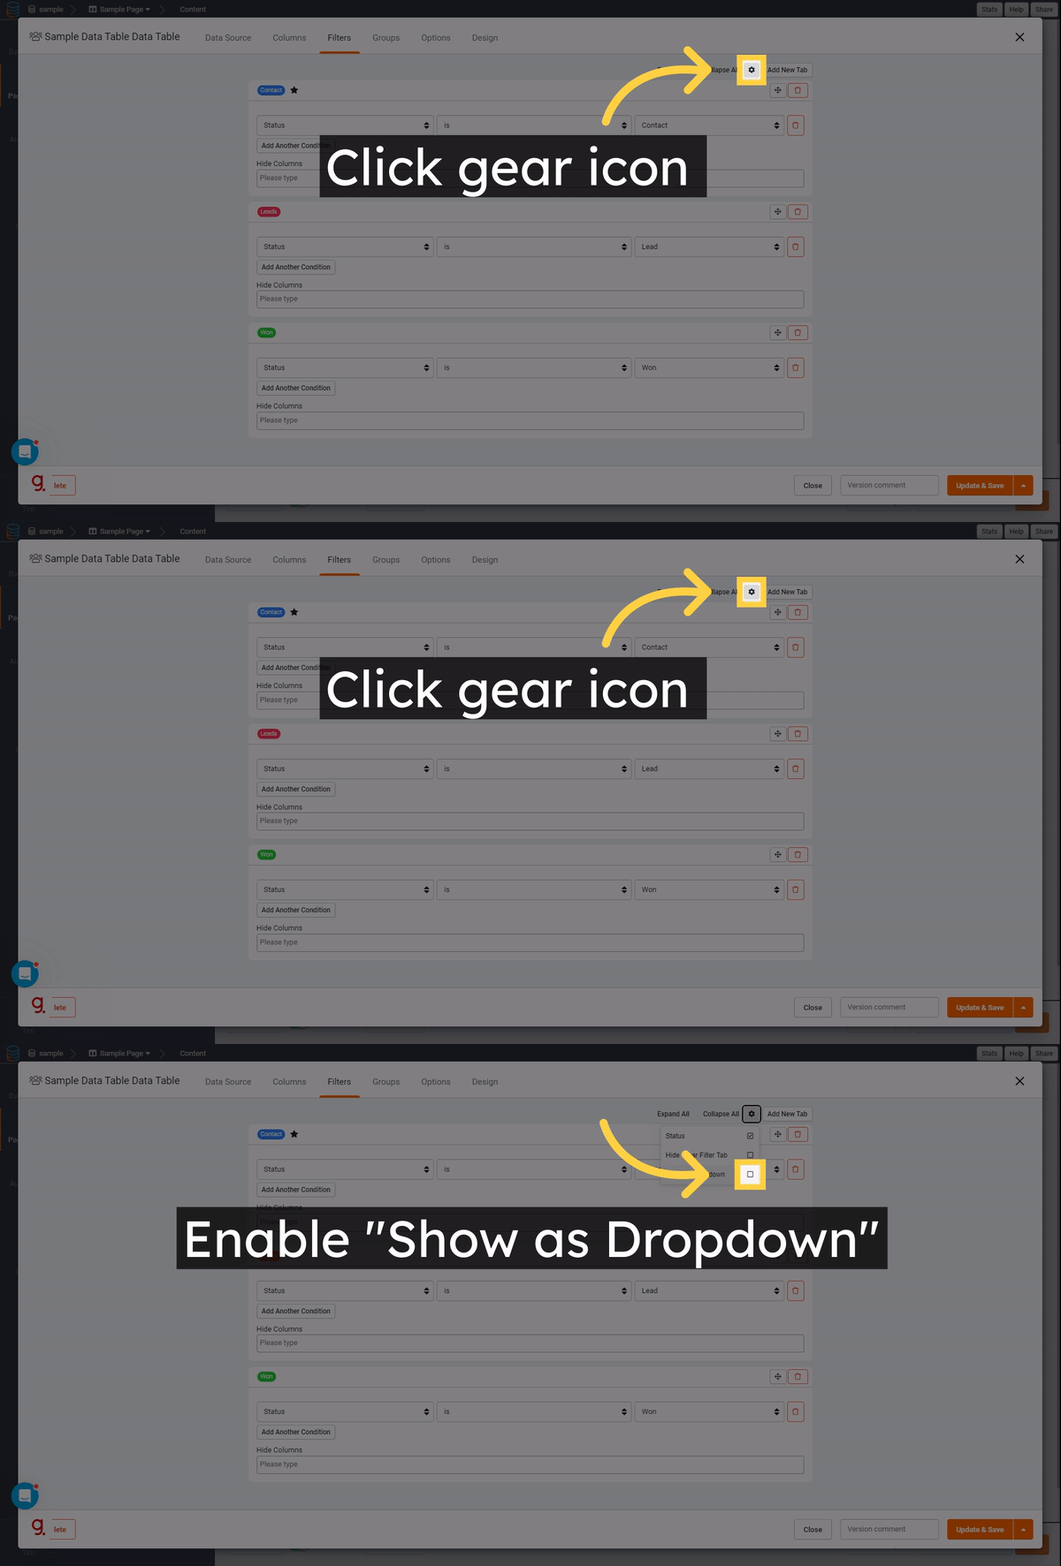
You may hide the Clear Filter tab in the Filter Tab settings menu
Show as Dropdown
You may convert the Filter Tabs to display as a dropdown menu in the Filter Tab settings menu.
 |


We'd love to hear your feedback.