PDF Forms
With PDF Forms you can upload a PDF file, add dynamic fields, and use data from within your app to populate the PDF Form via Action Links or Tasks. When the PDF Form is generated, it will immediately download to your device.
Upload a PDF
Give your PDF Form a name and select the PDF to upload.
Current Limitations:
- Only PDF files are allowed
- Max of 10 pages per PDF
- Max file size is 1MB
- PDF cannot be encrypted or password protected
- English is the only language supported.
Due to the possibility of unsupported PDF documents being uploaded, it is recommended that you test the PDF through an action link before adding placeholders. If the PDF downloads as expected, you can proceed to add placeholder fields. Otherwise, open the PDF in your Chrome browser and click "Print as a PDF", then use the new PDF inside the PDF form upload.
Add Placeholder Fields
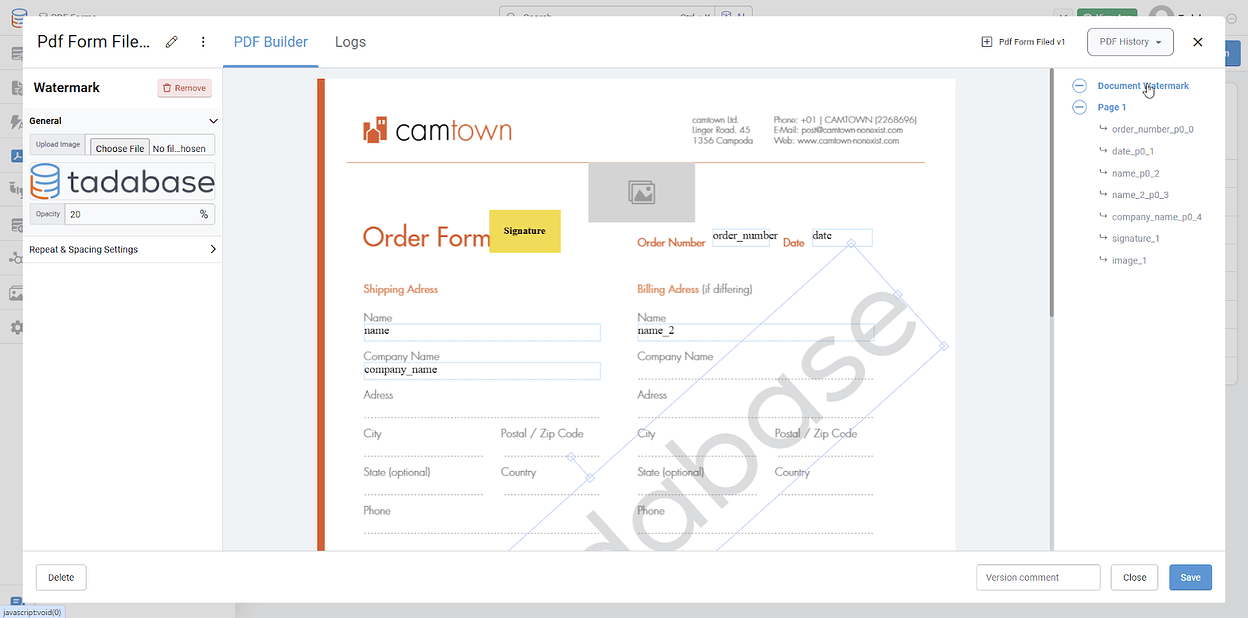
Open the PDF and start adding placeholder fields which will be automatically filled with records from your app.
There are currently 4 value types that can be added as listed below. We'll look at each one closely in the following section.
Text
To add a text placeholder field to your PDF, click the Text button on the left hand panel.
Drag the Text placeholder to the desired part of the PDF.
Name
When you add a placeholder, an option pane will appear on the left hand side. On the top, you can choose the placeholder name. Enter the name of the field (i.e., Last Name, First Name, etc.) The placeholder name will appear as an option when you choose to fill the PDF form within your app. The placeholder name is also displayed in the PDF file structure on the right hand side.
Text as Date
To format a text placeholder as a date, toggle the "Contains Date" option to on. Then, choose a date format from the date format dropdown list.
Style
On the left-hand side, in the Style tab, you can adjust the font size, font family, line height, and color. You can also adjust the width and height of the text box. Be sure to account for lengthy text values.
Position
In the position tab, you can adjust the position of the text box. This option allows you to ensure that all fields are evenly aligned. The "Left" option allows you to choose how many pixels (px) the text box should be from the left. The "Top" option allows you to choose how many pixels (px) the text box should be from the top.
Checkbox
To add a checkbox placeholder field to your PDF, click the Checkbox button on the left hand panel.
Drag the Checkbox placeholder to the desired part of the PDF.
Placeholder Name
When you add a placeholder, an option pane will appear on the left hand side. On the top, you can choose the placeholder name. Enter the name of the field (i.e., US Citizen Checkbox, etc.) The placeholder name will appear as an option when you choose to fill the PDF form within your app. The placeholder name is also displayed in the PDF file structure on the right hand side of the window.
True and False Values
For the Checkbox placeholder, you also have the option to set the true and false values. This means that when the True value matches the record value, the checkbox will appear. When the False value matches the record value, no checkbox will appear. The default options are true and false. In the example below, the check will appear when the "US Citizen Checkbox" field is filled with "citizen".
You can also add multiple True Values separated by commas. For example: setting the True Value to 'red,orange,yellow' will show a checkbox if the set value is either 'red', 'orange', or 'yellow'
If there is only one True Value do not include any commas, or the checkbox will assume there are multiple values.
Style
In the style tab, you can adjust the width and height of the checkbox field.
Position
In the position tab, you can adjust the position of the checkbox field. This option allows you to ensure that all fields are evenly aligned. The "Left" option allows you to choose how many pixels (px) the checkbox should be from the left. The "Top" option allows you to choose how many pixels (px) the checkbox should be from the top.
Image
To add a image placeholder field to your PDF, click the Image button on the left hand panel.
Drag the Image placeholder to the desired part of the PDF.
Placeholder Name
When you add a placeholder, an option pane will appear on the left hand side. On the top, you can choose the placeholder name. Enter the name of the placeholder (i.e., Driver's License, etc.) The placeholder name will appear as an option when you choose to fill the PDF form within your app. The placeholder name is also displayed in the PDF file structure on the right hand side of the window.
Turn on the "Keep Aspect Ratio" option to keep your image in the original proportion.
Size and Position
In the Size and Position tab, adjust the width and height of the Image placeholder. This will affect the width and height of the image filled in the PDF. Note: The "Keep Aspect Ratio" option above will override these settings.
The Left and Top options allow you to adjust the exact position of the Image field. This option allows you to ensure that all fields are evenly aligned. The "Left" option allows you to choose how many pixels (px) the Image should be from the left. The "Top" option allows you to choose how many pixels (px) the Image should be from the top.
The Image Placeholders will only work with the Attachments/Files field if it is set to "Format Link as Image". If an attachments field is selected with multiple images, only the first image will be displayed.
Signature
To add a signature placeholder field to your PDF, click the Signature button on the left hand panel.
Drag the Signature placeholder to the desired part of the PDF.
Placeholder Name
When you add a placeholder, an option pane will appear on the left hand side. On the top, you can choose the placeholder name. Enter the name of the placeholder (i.e., Employee Signature, etc.) The placeholder name will appear as an option when you choose to fill the PDF form within your app. The placeholder name is also displayed in the PDF file structure on the right hand side of the window.
Style
In the style tab, adjust the width and height of the Signature placeholder. This will affect the width and height of the signature filled in the PDF.
Position
In the position tab, you can adjust the position of the Signature field. This option allows you to ensure that all fields are evenly aligned. The "Left" option allows you to choose how many pixels (px) the Signature should be from the left. The "Top" option allows you to choose how many pixels (px) the Signature should be from the top.
Fill a PDF Form via an Action Link
You can fill a PDF form through action links in a table component, a list component, and a custom component.
The option to "Fill a PDF Form" is not currently supported in the Details and Kanban components.
In the page builder, create a data component and add an action link.
Double click on the Action link column to open up the column editor. In the General tab, choose a name for your action link.
In the Format tab, under Link Type, choose whether to display the Action Link as a link or a button.
Then choose the "Fill a PDF Form" option from the dropdown list.
Then, select the PDF Form you would like to fill.
Click "Set PDF Fields" and choose the PDF Placeholder Values you would like to set. You can set the PDF placeholder values to either a Record Value, Custom Value, Blank Value, Logged In User Field, a Browser Local Storage, or a Browser Session Storage.
You can also set the PDF File Name to a Custom Value or a Record Value.
Next, choose a success behavior, click update, and then click update and save.
Open up the web page in the browser by clicking the "Preview Page" button in the bottom left corner of the screen.
In the web page, click on the action link you created.
That's it! The PDF download should begin immediately.
If the PDF Form does not download, it is likely that it is not in a supported PDF format. We recommend opening the original PDF in Chrome and printing it as a PDF. Then, navigate back to PDF Forms and upload the PDF file again.
Compliance:
Tadabase's electronic signature solutions comply with the UETA (The Uniform Electronic Transactions Act) and the E-SIGN Act (The Electronic Signatures in Global and National Commerce Act) and are eligible to be recognized as valid under U.S. law.
We'd love to hear your feedback.