
Adding PayPal payment buttons to your app
While Tadabase does not yet support ecommerce, you may still accept payments from your users by adding PayPal payment buttons to your app to redirect users to PayPal directly from your app.
When users click on the PayPal payment button embedded strategically on your app, they will be redirected to PayPal where you can accept payments via PayPal and/or major credit cards.
Adding PayPal payment buttons to your app is easy and involves a simple four step process:
- Sign in to PayPal
- Select PayPal payment button
- Customize payment button details
- Add payment button details to Tadabase
Let's walk through each of these four steps.
1. Sign in to PayPal
The first step is to sign in to your PayPal account or create a PayPal account.
2. Select PayPal payment button
In your PayPal account, click on Tools > All Tools > PayPal buttons:

You will then be prompted to select the type of payment button you would like to add to your app, such as Buy Now, Add to Cart, Donate, etc.:

3. Customize payment button details
Once you select the payment button of your choice, you will be prompted to customize your payment button according to your payment preferences including currency, billing amount, billing cycle, etc. For instance, for the purpose of this example we'll choose the Subscribe payment button and customize our preferred payment details as illustrated below:
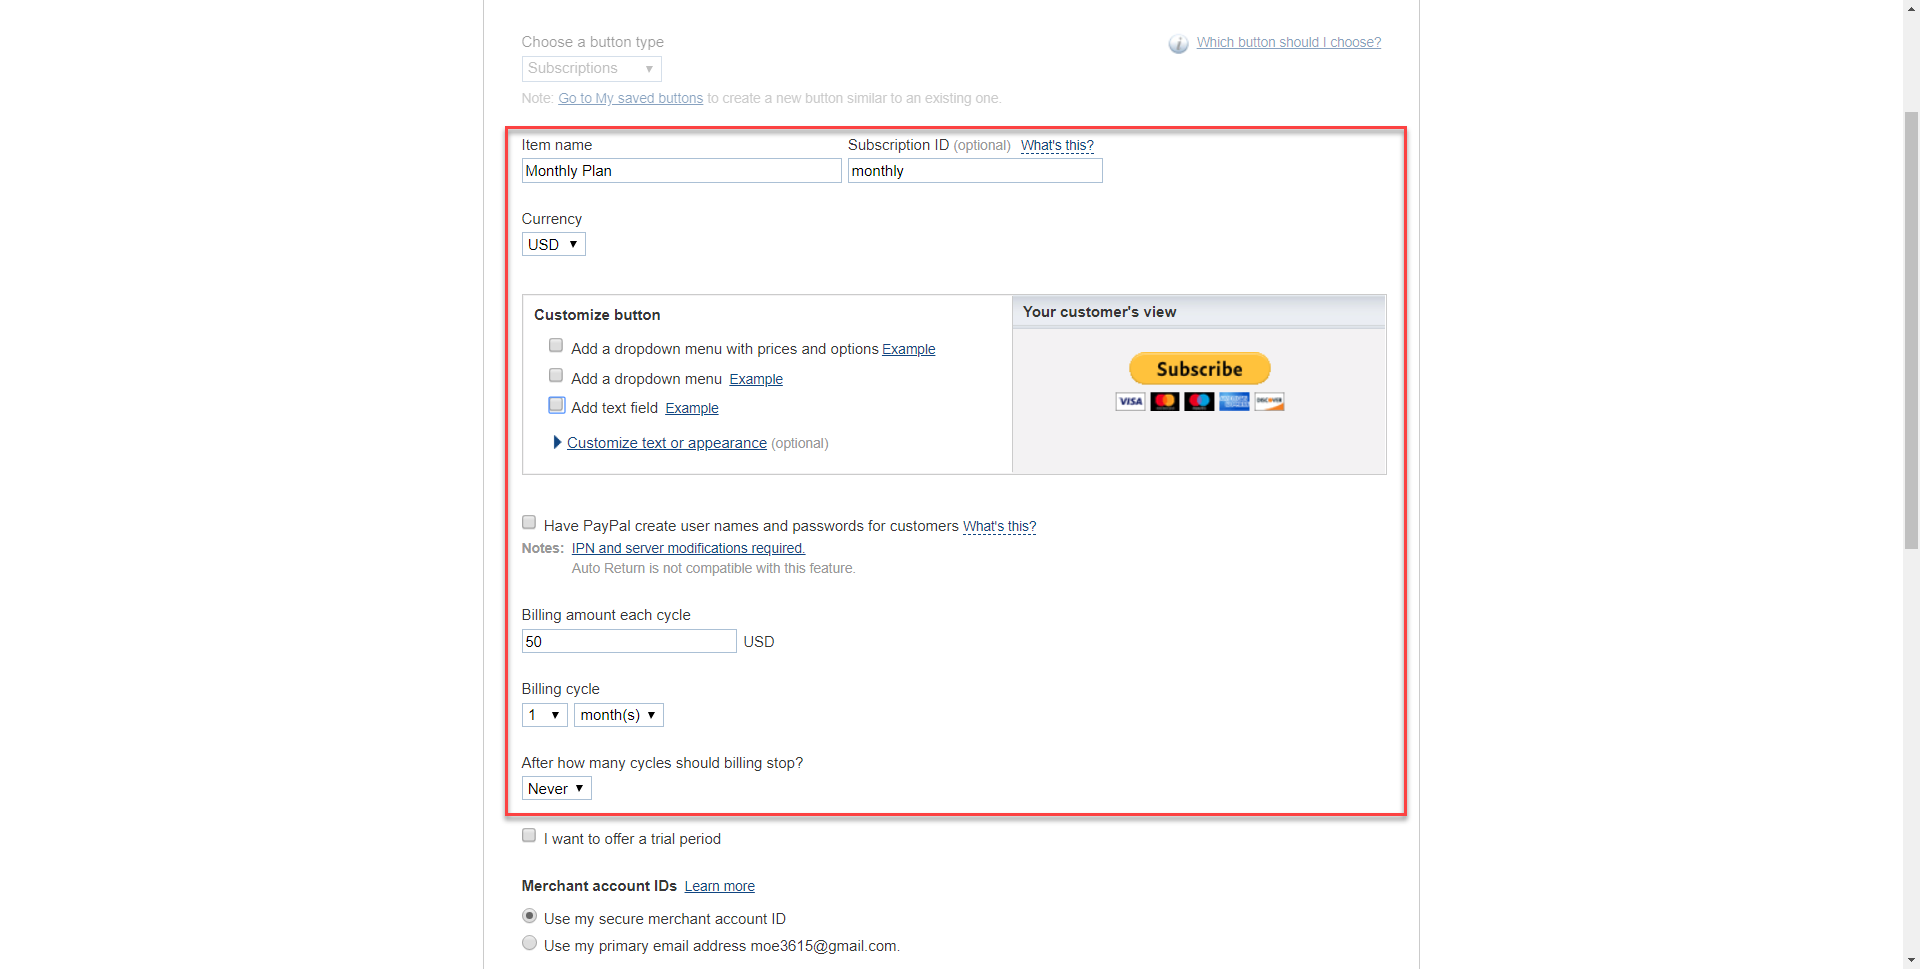
Once you have configured your preferred payment details that are relevant for your selected payment button, click Create Button.
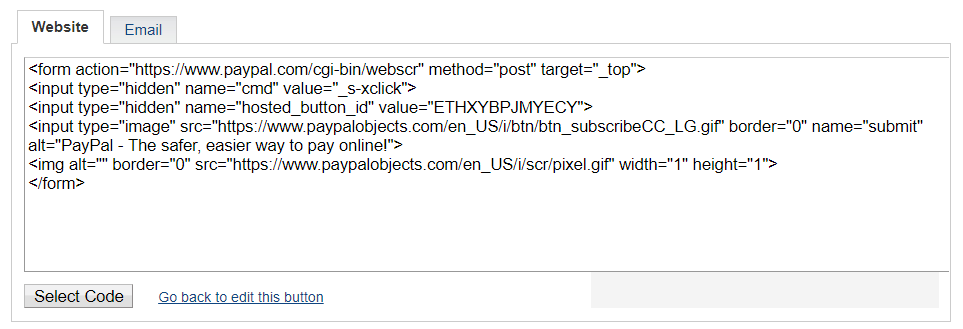
You will be routed to a new page that will provide the HTML code you will need to use back within your Tadabase app to successfully add your PayPal payment button to your app:
4. Add payment button details to Tadabase
There are three items in the above HTML code that you will need to copy and paste within your Tadabase app:
- The URL
- The Method
- The Parameters - each parameter will have a name and a value.

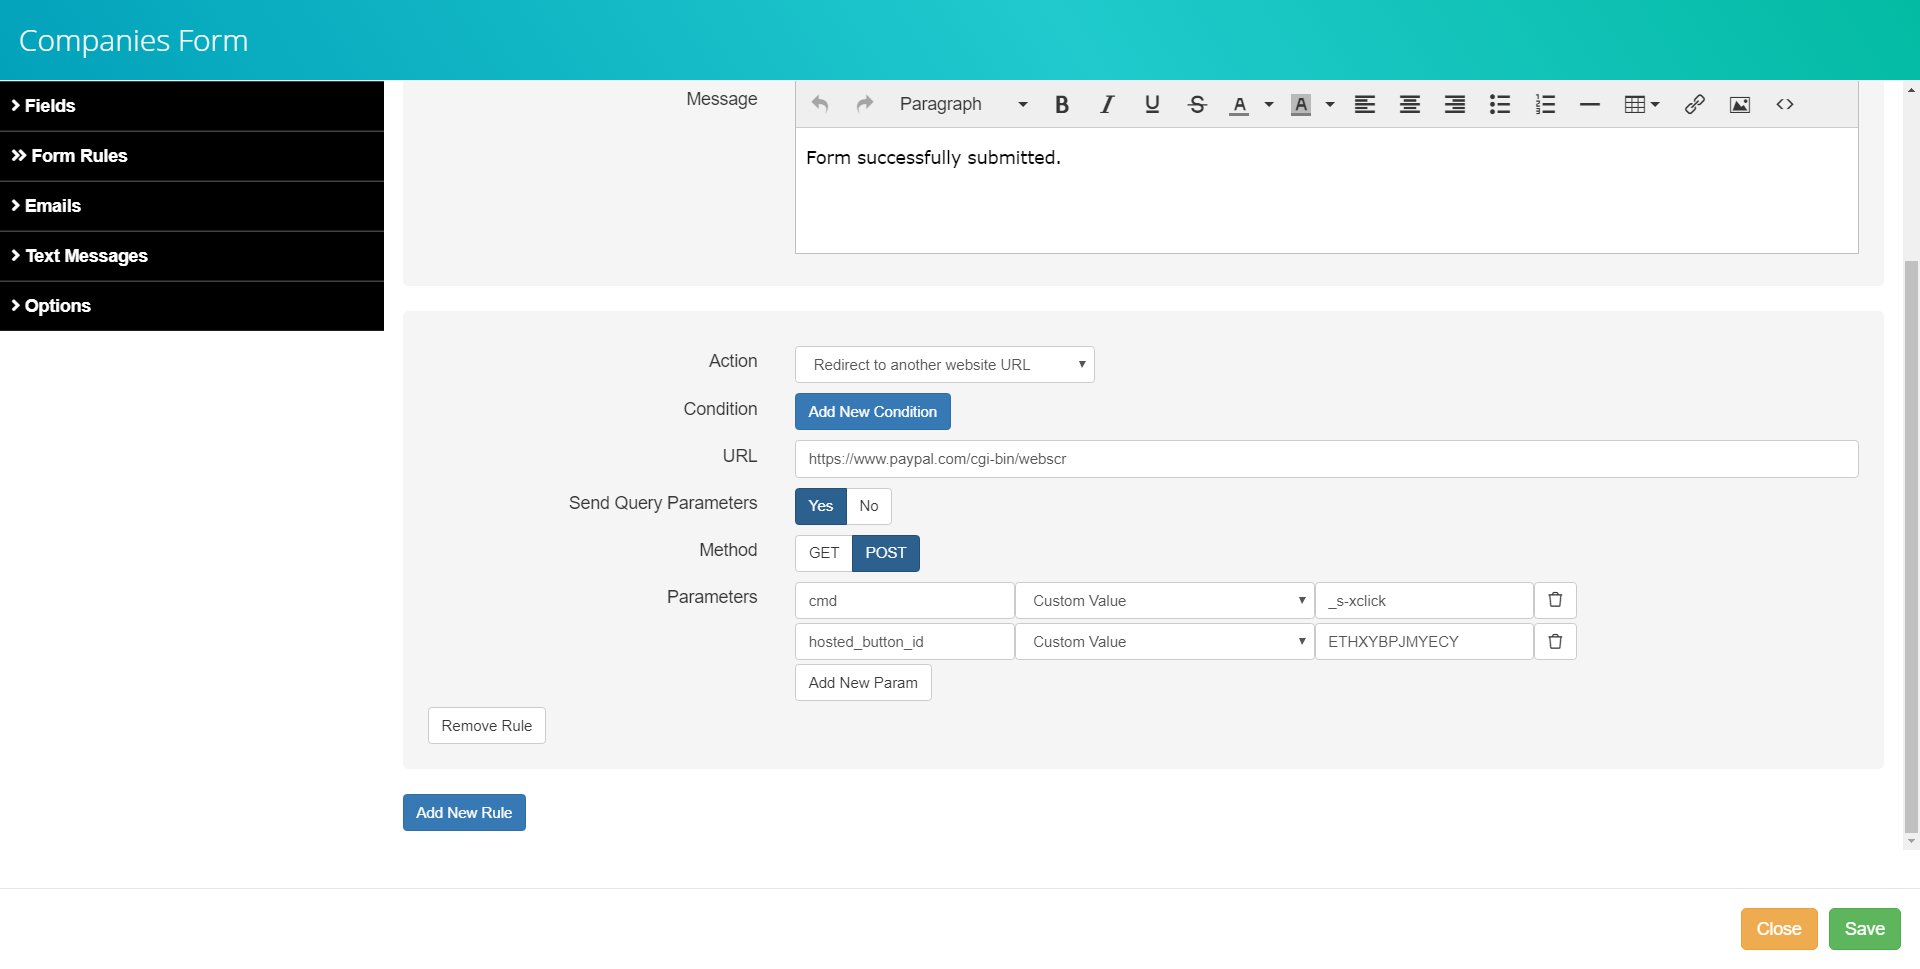
Now it's time to copy and paste the necessary code items above within a form in your Tadabase app. Back in your Tadabase app, you can create a Submit Rule in any form to auto-route your users to Paypal once they click on the embedded Paypal payment button.
First, create a new form or open an existing form in your app. Click on Form Rules > Submit Rules > Add New Rule:

For your new rule, set the Action to Redirect to another website URL. You can also add a new condition, if necessary, for when the action should apply (for instance, if the user chose the "Monthly Plan").
Then, using the copied values from your PayPal payment button HTML code provided in the previous step, enter the correct values for URL, Parameters, and Method as illustrated below:
Once you've added your PayPal payment button to a form within your app, you can strategically use the form/button to route users to PayPal and accept payment via PayPal and/or major credit cards.