
Incoming Webhooks
Incoming webhooks enable you to receive and act on data sent from 3rd party platforms.
For example:
- Every time a customer is updated in Stripe, update Tadabase.
- When a new form is received from JotForm, update Tadabase
While you might already be doing this with 3rd party software like Zapier or Integromat, our incoming webhook catcher is purpose-built for your Tadabase app, and is better at working with larger and more rapid requests.
Getting Started
Getting started is fairly straightforward:
- Create an account
- Add your Apps
- Create Webhooks
Create Account
To get started, go to https://catch.tadabase.io and log in/create your account. When creating an account, make sure you use the same email as your Tadabase account. Feel free to use any password you wish.
Our Webhook Catcher is intentionally built separately from our Builder as a microservice. This means you'll need to create a new account. We are providing this as a microservice to ensure it can be iterated and updated more frequently, as well as being able to scale more rapidly.

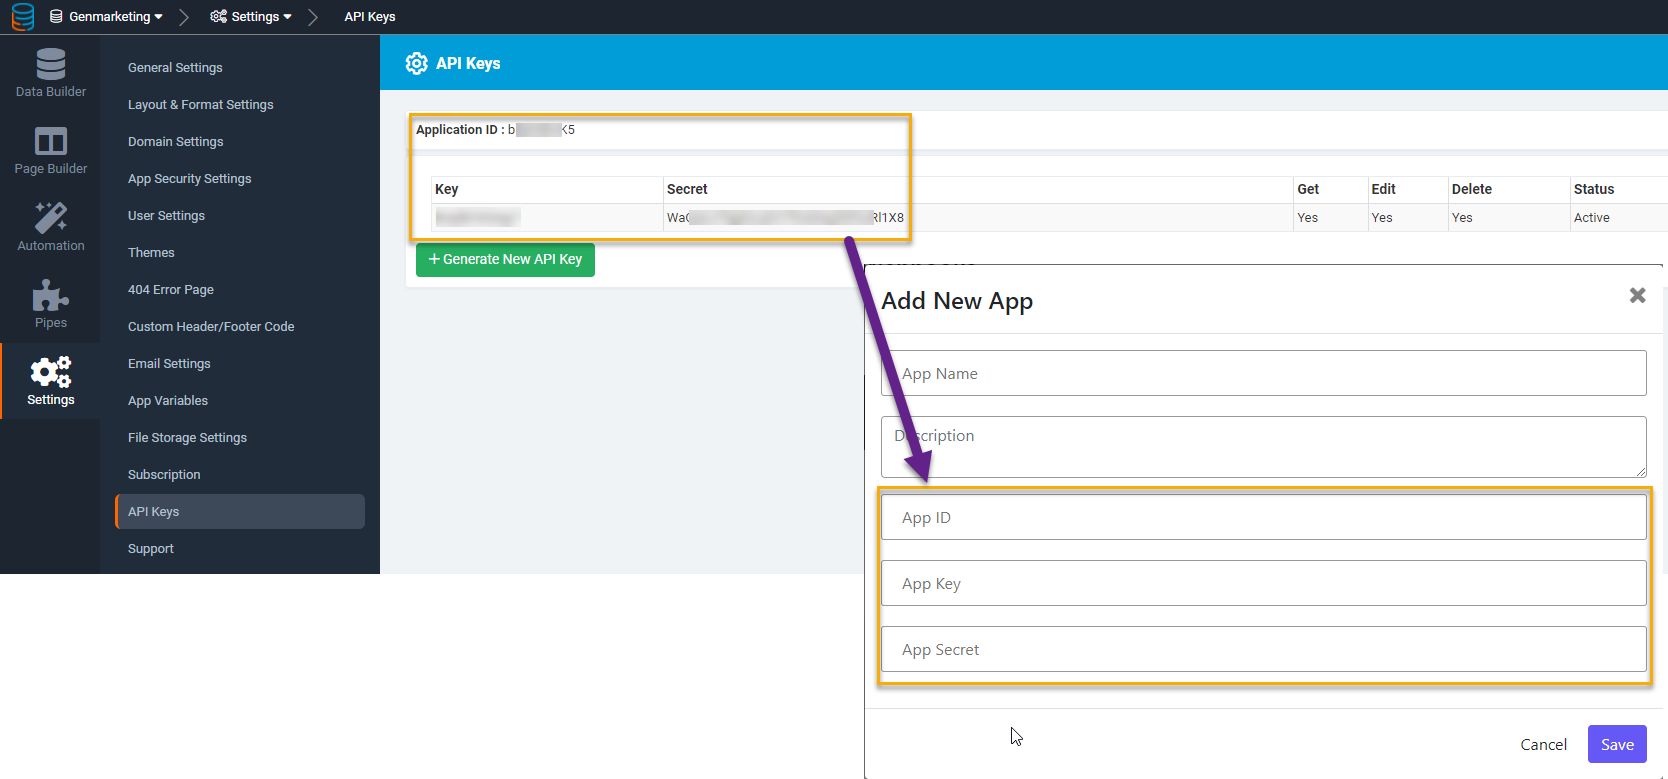
Add your Apps
Once you've logged in, add all the apps you wish to create incoming webhooks for. Simply give the app a name, description, and the API credentials from within your Tadabase app.
Create Webhooks
To create a webhook, give your webhook a name and description for your reference. Then select the app to be used for this webhook.
When saving data to your app, the webhook enables you to determine how equations should be run.
The options are:
- Run Equations
- Send Equations to the Queue
- Don't run Equations

When you run equations, each request will take a bit of extra time as the data is processed. However, there are times when you want the record to get added more quickly. In that case, you can choose to send equations to the queue or not run equations at all.
When choose to not run equations, any equation in your Tadabase App will not be updated until you manually trigger them. You can do this by running a special API call.
Once you've completed the necessary webhook information, a new endpoint URL will be dynamically created for you. Copy this and use this in whichever external service you want to send webhooks from.

In this example, we'll look at a sample Stripe request. We want to save all changes made in Stripe Customers directly back to our app.
Inside of Stripe go to Developers -> Webhooks and click on +Add endpoint:

Paste in the generated Webhook endpoint URL and choose which events should receive this webhook. For this example, we'll choose Customer Created.

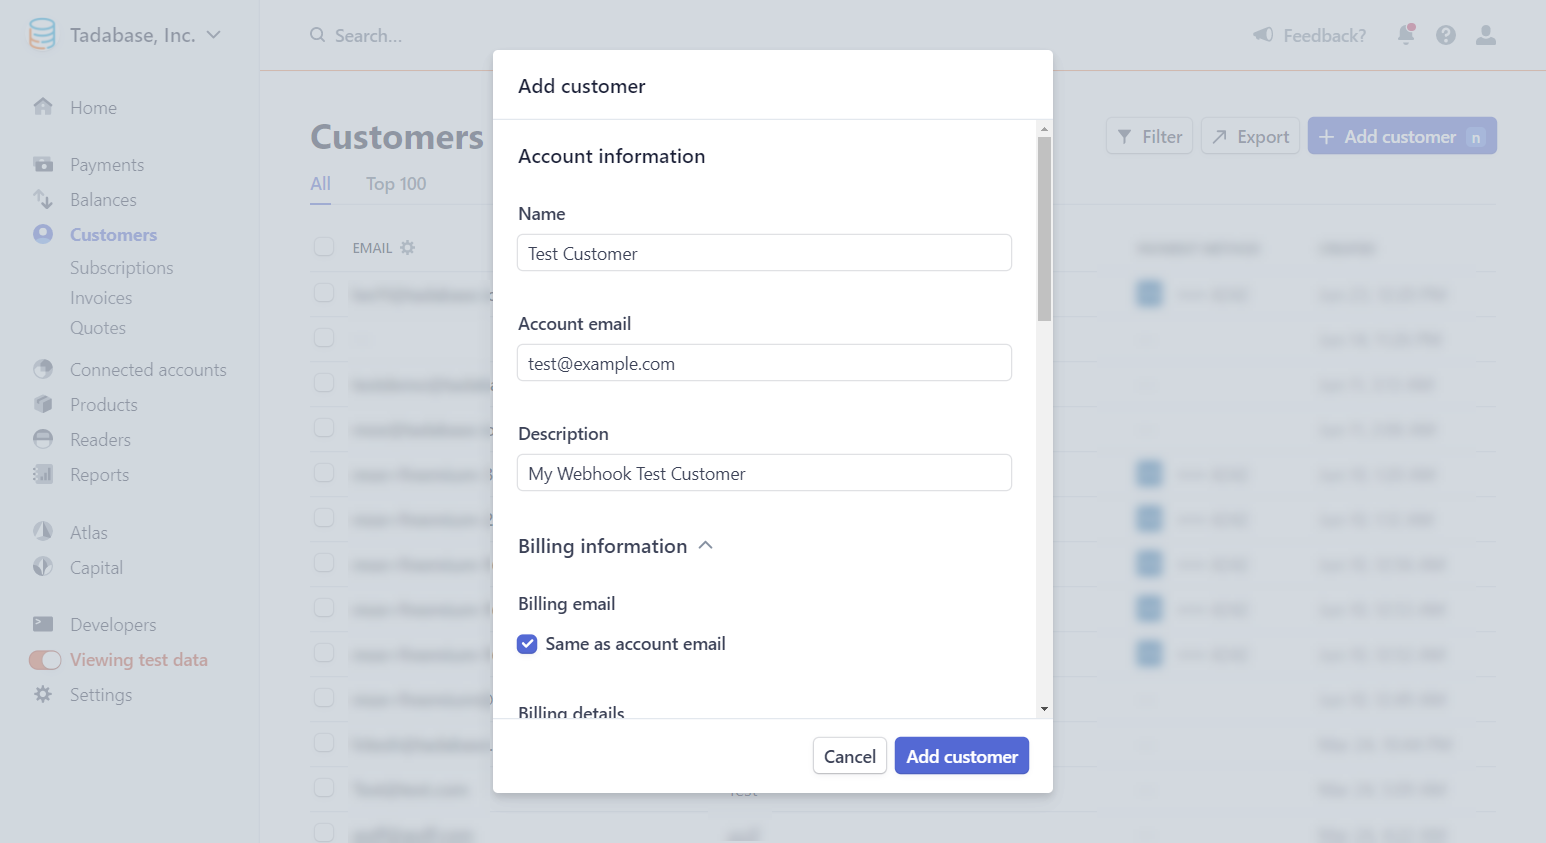
Now let's create a new test customer.
Back in the webhook catcher, refresh the page and you'll be able to see the request from Stripe. Our next step is to map the request from Stripe to the Data Table and Fields within our app.
- Choose Data Table
- Choose to update or create new records
- Determine if this webhook has multiple values/records
- Map fields
Choose the Data Table:
This can be any data table inside of your app.
Update or Create:
If this webhook will always create a new record, choose to Create a New Record. For updating existing records, choose to Update an Existing Record.
When Updating an Existing Record, you'll need to put in the ID of the record that should be updated. If the incoming request contains the ID, put in the key name for that value. If it's a static value, choose Static and enter the static record ID to be updated.
You can also add an extra option to create a new record if the ID is not found by checking the field labeled Create New Record if ID is Not Found.
Finally, map each field in your Data Table to the value of the webhook key.
For example: in our Stripe request, we have an incoming request with a key named "name". If we want to save that value to the Name field in Tadabase we can set that as a dynamic value with the full path:

As you can see, the "name" is nested under "object" which is nested under "data" so we'd need to set the value as:
data.object.nameWhereas a Dynamic Value will use whichever value is passed from any given request, you can also pass Static values as well which allows you to save a value of your choice, as a static value every time. A static value has no reference to the incoming webhook request and will pass the same value for every request received.
The "Special" option allows you to save either the Webhook ID or Webhook Call-ID. This can be useful for troubleshooting later so you can see the details of the request that came in and what got saved to your Data Table.
After creating your webhooks, you can view the details of each webhook to see stats and details about each request.

If a webhook failed for some reason, you can rerun it and it will re-attempt the request to your app.
Multi Value Webhooks
You can break an incoming request into multiple records. For example, suppose your incoming payload looks like this:
{
  "customers": [
    {
      "name": "John",
      "email": "john@tadabase.io",
      "country": "USA"
    },
     {
      "name": "John 2",
      "email": "john2@tadabase.io",
      "country": "USA"
    }
  ]
}
Here the "Array Key" will be "customers", each record inside that array can be its own record.
If you are using a multi-value array, you can not access any values outside of the array. For example, in the payload below, the "date" is not available.
{
  "date" : "2021-10-15",
  "customers": [
    {
      "name": "John",
      "email": "john@tadabase.io",
      "country": "USA"
    },
     {
      "name": "John 2",
      "email": "john2@tadabase.io",
      "country": "USA"
    }
  ]
}
Once you add the array key into the Multi-value field, any values inside the array can be access directly in the other fields.

The above request will result in 2 records being added:
