Logo
For example "scheduled tasks"
Search
Info
Content
Category Navigation
  • 🎯  Solution Guides

  • Low Code Solutions

    Add "Tabs" to your app

    ID Target Link

    Use an address field to display a static street view thumbnail

    Turn your menu into a fixed menu

    Auto close mobile menu

    Display record information in a card

    How to add a back button to your app

    Add a collapsible accordion element to your app

    Code Snippets

    PHP Curl Create New Record

    PHP Get Records With Filters

    Google Scripts - Get record and create new records from connected table

    Save Tables and Fields into Spreadsheet

    Google Scripts - Export all records

    Webhook to save deleted records

    Send Messages to Slack

    Restrict Space and Force Uppercase in a Form

    Building Advanced Features

    Use Validation Rules to Ensure Unique Votes Per User

    Use Record Rules to Create an Audit Log

    Track current inventory with transactions

    Schedule Bookings and Prevent Double Bookings

    Create orders with multiple items and varying quantities

    2 Step Forms

    Unique Record Validation

    Restrict Editing Records to Record Owners

    Sum date/time field

    Duplicate Records

    Advanced App Customization

    How to embed a Tadabase page on another website

    Adding external fonts

    Custom Favicon

    Making apps mobile friendly

    Show date/time as a countdown

    Importing many images at once

    Adding QR Codes

    Adding charts to PDFs

    Customizing your app shortcut for mobile phones

    Animate parts of a page

    Design Customization

    Changing background colors

    Set background colors to the edge of a page

    Change the background of a column

    Add padding around a component

    Using an image as background for a page

    Adding a background image to a row, column, or component

  • Duplicate Connected Records

Categories
🎯 Solution Guides
Low Code Solutions
Add "Tabs" to your app

Add "Tabs" to your app

In this article, we'll be going over how to create tabs for your web application using a front-end framework called Materializecss (https://materializecss.com/tabs.html)


This is how our end result will look.


gzAgICgqiT1q23YT8ytMVetNS9Cn88abNA.gif


To start we'll need to include the framework in the custom header and footer code of our Tadabase app.

Copy and paste the following in the Custom Header Code Section
<style>
.tab-col {
    margin: 0 15px;
}
.tabs {
    position: relative;
    overflow-x: auto;
    overflow-y: hidden;
    height: 48px;
    width: 100%;
    background-color: #fff;
    margin: 25px auto 0 auto;
    white-space: nowrap;
    text-align: center;
    border: none;
    border-radius: 10px;
    box-shadow: 0 0 20px rgb(8 21 66 / 5%);
    z-index: 99;
}

.tabs .tab {
    display: inline-block;
    text-align: center;
    line-height: 48px;
    height: 48px;
    padding: 0;
    margin: 0;
    text-transform: uppercase;
}

.tabs .tab a {
    color: #8b8b8b;
    display: block;
    width: 100%;
    height: 100%;
    padding: 0 24px;
    font-size: 14px;
    text-overflow: ellipsis;
    overflow: hidden;
}

.tabs .tab a:focus,
.tabs .tab a.active {
    background-color: none !important;
    outline: none;
    color: #0128FF;
    font-weight: 700;
    text-decoration: none;
}

.tabs .tab a:hover {
    background-color: transparent;
    color: #0128FF;
    text-decoration: none;
}


.tabs .indicator {
    position: absolute;
    bottom: 0;
    height: 2px;
    background-color: #0128FF;
    will-change: left, right;
}

@media only screen and (max-width : 992px) {
    .tabs {
        display: flex;
    }

    .tabs .tab {
        flex-grow: 1;
    }

    .tabs .tab a {
        padding: 0;
    }

    ul {
        padding-inline-start: 0;
    }
}
</style>

Copy and paste the following into the Custom Footer Code section

<script src="https://cdnjs.cloudflare.com/ajax/libs/materialize/1.0.0/js/materialize.min.js"></script>

Snag_963afcf.png

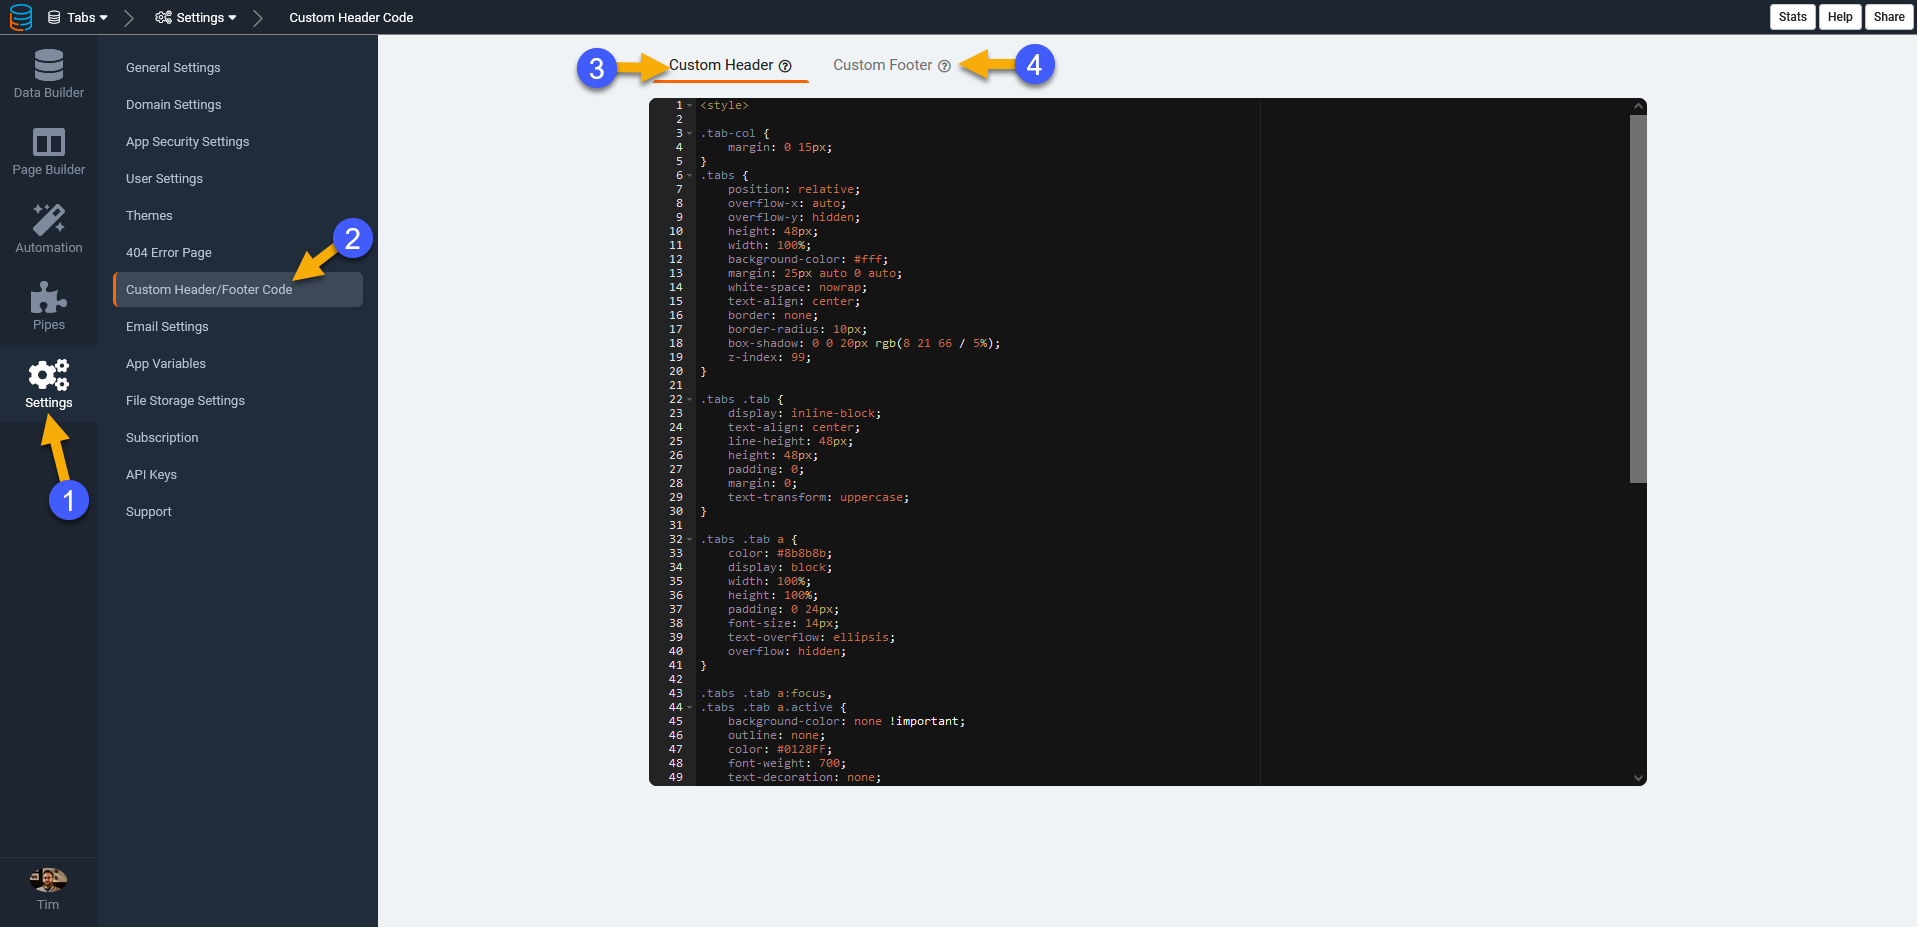
Next, we'll need to add the following to the source code of an HTML component on the page builder

HTML
<div class="row">
    <div class="col s12 tab-col">
        <ul class="tabs">
            <li class="tab col s3"><a class="active" href="#test1">Test 1</a></li>
            <li class="tab col s3"><a href="#test2">Test 2</a></li>
            <li class="tab col s3"><a href="#test3">Test 3</a></li>
            <li class="tab col s3"><a href="#test4">Test 4</a></li>
        </ul>
    </div>
    <div id="test1" class="col s12">&nbsp;</div>
    <div id="test2" class="col s12">&nbsp;</div>
    <div id="test3" class="col s12">&nbsp;</div>
    <div id="test4" class="col s12">&nbsp;</div>
</div>

8C07351D-2C30-424D-8600-F3719C4D577E.GIF


For this example, we'll be placing three tables into three of the tabs.

To do this, we'll need to add a CSS Class to each of the rows the tables are in.

As you can see in the image below, we have three rows that each contains a Data Table

Snag_96cd5da.png


To add a CSS class to each row, click on Edit

Then select "Design" and then "CSS" and add a CSS Class

Repeat that process until you've defined a unique CSS Class for each row.


Next, we'll add the following JavaScript to the page

JavaScript
$(document).ready(function(){
    $('.tabs').tabs();
    $('.row-1').appendTo('#test1');
    $('.row-2').appendTo('#test2');
    $('.row-3').appendTo('#test4');
});
Remember to replace the Classes shown in this example with the CSS Classes you added to each row.

How did we do ?

Next Article
ID Target Link
Back to top
API
100% Operational
Apps
100% Operational
Builder
100% Operational
Overall Status
100% Operational